
Your first overnight backpacking trip does not require a closet full of specialist gear. It does require a shelter, a sleep system that matches the forecast, enough food and treated water, clothing for changing conditions, and a way to navigate and handle problems. This beginner backpacking gear checklist walks through what to bring, what to buy first, and what you can leave at home.
Affiliate disclosure: This article contains affiliate links. TestedWise may earn a commission if you purchase through them, at no additional cost to you. Read the full disclosure.
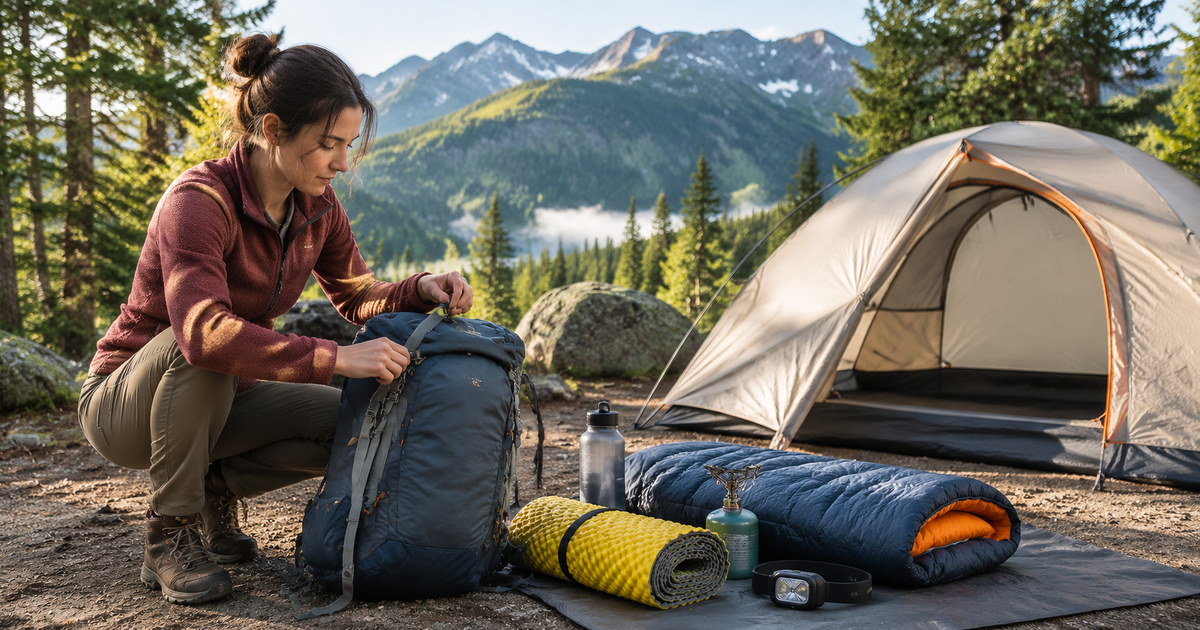
This guide is for a first one- or two-night trip on an established trail in ordinary three-season conditions. It is not a winter mountaineering list, a desert water-planning guide or a substitute for local regulations and training. If you are staying beside a vehicle at a developed campground, the equipment needs are different; our camp kitchen essentials guide covers that car-camping setup.
1. Choose the trip before buying gear
The fastest way to spend too much on equipment is to shop before you know where you are going. A mild overnight on a maintained trail with a reliable water source is a very different outing from a remote route with a long climb, exposed campsites, cold nights or no dependable water. Decide on the trip first, then build the list around it.
Pick a first route with room for mistakes
For a first overnight, look for a route that is within your current walking ability, has a clearly marked trail, a legal place to camp and a realistic way to refill water. A shorter approach gives you time to pitch the tent, sort food and learn your kit before dark. Avoid making your first trip a high-mileage challenge or a route where a missed turn, bad forecast or slow pace could leave you far from help.
Before leaving, check the managing agency's current trail alerts, closures, permit rules, campsite requirements, fire restrictions and water information. Read the forecast for the actual area and elevation rather than relying on the weather in the nearest town. Tell someone your route, trailhead, campsite plan and expected return time. The National Park Service's Hike Smart guidance is a useful starting point for planning and decision-making.
Know which conditions this checklist does not cover
A three-season tent and a 20°F sleeping bag do not automatically make a kit suitable for snow, freezing rain, strong winds or exposed alpine terrain. Desert routes may require longer water carries and more sun protection. Some parks require a bear-resistant canister or a specific food-storage method. If the forecast, route or local rules exceed your experience, change the plan or go with someone who has the right skills and equipment.
2. The big four: pack, shelter, sleeping bag and pad
These four items take up much of the space and weight in an overnight kit. They also need to work together. A bulky tent may force you into a larger pack; a warm sleeping bag is less useful on a poorly insulated pad; and a pack that does not fit can make even a short approach miserable.
Choose a backpack by torso fit and packed volume
For a compact one- to three-night trip, REI places efficient weekend packing in the 30–50-liter range. A first-time backpacker using less compact or borrowed equipment may need the upper end of that range, while a person with bulky cold-weather gear may need more. Capacity is not a target: buying a larger pack can make it easier to carry unnecessary items.
Fit matters more than the logo. Measure torso length rather than choosing by height alone, and check the hip-belt range. The hip belt should sit over the top of the hip bones and carry most of the load; shoulder straps stabilize the pack rather than taking all its weight. Try the pack with a realistic load, adjust the torso and hip belt, and walk around before committing. REI's backpack sizing and fit guide explains how to check torso length and fit.
A framed pack with an adjustable suspension is forgiving for many beginners. A frameless ultralight pack can work well with a carefully reduced load, but it is not automatically more comfortable or easier to use. If your first kit is bulky, a supportive 45–50-liter pack is often a more sensible starting point than trying to force everything into a tiny bag.
Use a backpacking tent, not a bulky backyard tent
Check the complete packed weight, not just the advertised minimum trail weight. The packed figure may include stakes, guylines, stuff sacks and the footprint; minimum trail weight may leave some of those out. A tent that says “two person” usually means two sleeping pads fit on the floor. It does not promise generous room for two people and all their packs.
For two hikers, a two-person tent with two doors and vestibules is convenient because each person can enter without climbing over the other, and wet shoes or packs can stay outside the sleeping area. Split the tent body, poles and fly between partners if the design allows it. A solo hiker may prefer a one-person tent to save weight, or choose a two-person model for extra room and accept the weight penalty.
Freestanding tents are often easier to pitch on firm or rocky ground, but they still need to be staked and guyed properly in wind. Trekking-pole tents can save weight, but they require suitable poles and more attention to site selection and tension. For a first trip, an intuitive pitch is worth something; practice it at home before relying on it in the dark or rain.
Match the sleeping bag to the actual overnight low
Do not choose a sleeping bag from the warmest daytime forecast. Use the expected overnight low at the campsite, allow for elevation and weather uncertainty, and think about whether you usually sleep warm or cold. A bag's temperature label is not always directly comparable with another brand's label.
Look for an ISO or EN comfort and limit rating. The comfort rating is the better reference for a person who tends to sleep cold; the limit rating is aimed at a warmer sleeper. A label that only says “20°F” may be a manufacturer's rating rather than a directly comparable ISO comfort figure. REI explains the difference in its backpacking sleeping bag guide.
Down insulation compresses well and is attractive when pack space matters, but it needs protection from moisture and usually costs more. Synthetic insulation is often less expensive and retains more insulating ability when damp, but it is bulkier for a similar warmth level. Store either type loose at home rather than leaving it compressed in its stuff sack for months.
Do not overlook the sleeping pad's R-value
The pad is not just a mattress. It slows heat loss into the ground. A warm sleeping bag on a thin, low-insulation pad can still leave you cold. Sleeping-pad R-values are tested using ASTM F3340, and a higher R-value indicates more insulation. For reference, REI's current guide places R-values around 2–3.9 in its “cool” example and 4–5.4 in its “cold” example; choose for the actual low temperature and your sleep system rather than treating those bands as universal rules.
Air pads pack small and can be comfortable, but they can puncture. Self-inflating pads are often bulkier and heavier. Closed-cell foam pads are inexpensive and hard to damage, but they take up more space and may feel firm. Carry the repair kit for an inflatable pad and learn how to use it before the trip. REI's sleeping pad buying guide explains R-value, construction and fit.
3. The complete first overnight backpacking checklist
Use this as a working list for a one-night, three-season trip. Add or remove items for the forecast, terrain, regulations, group size and your own medical needs. Some group items—such as a tent, stove, repair kit or first-aid supplies—can be shared, but every person should carry the personal essentials they may need if the group separates.
| Category | Pack this | What to check |
|---|---|---|
| Carry | Backpacking pack, pack liner or waterproof dry bags, rain cover if included | Torso and hip-belt fit; the liner protects the contents even if the outer fabric wets through |
| Shelter | Backpacking tent or permitted shelter, poles, stakes, guylines, footprint if needed | All parts are present; pitch it at home; know the site's rules and wind exposure |
| Sleep | Sleeping bag or quilt, insulated pad, repair kit, sleep clothes | Bag rating suits the expected low; pad R-value suits the ground temperature; keep sleep clothes dry |
| Clothing | Hiking outfit, spare socks, base layer, insulating layer, rain shell, hat and gloves when needed | Avoid relying on cotton in cool or wet conditions; bring a dry layer for camp |
| Food and cooking | Dinner, breakfast, trail snacks, stove, compatible fuel, pot, spoon, lighter and backup ignition | Check fuel restrictions, calculate fuel for the menu, and never cook inside a tent |
| Water | Bottles or reservoir, filter or purifier, backup treatment when appropriate | Confirm water sources and treatment requirements; do not assume clear water is safe |
| Navigation | Route map, compass, offline map on a charged phone, power bank as needed | Download maps before leaving service; know how to use the compass and route |
| Safety | Headlamp, first-aid and blister supplies, whistle, emergency shelter, repair items, fire starter where legal | Check batteries, personalize first aid, and match emergency equipment to remoteness and weather |
| Sun and insects | Sunscreen, sunglasses, hat, insect repellent, protective clothing | Choose protection for the season, exposure and local insects |
| Food storage | Required bear canister, food locker plan or approved hanging system | Follow the exact park or land-manager rule; include trash and scented toiletries where required |
| Hygiene and waste | Toilet paper or permitted alternative, trowel or waste bag as required, hand sanitizer, small toiletries, trash bags | Check local human-waste rules and pack out all trash and food scraps |
| Personal | Permit or pass, ID, phone, medications, small cash or card, emergency contacts | Keep permits and essential medication accessible and protected from water |
Clothing: pack layers, not outfit changes
For a mild three-season overnight, one set of hiking clothes plus a small camp/sleep layer is usually more useful than packing a fresh outfit for every activity. A practical system is a moisture-managing base layer, a light insulating layer such as fleece or a puffy jacket, and a waterproof rain shell. Add warm hat, gloves or extra insulation if the forecast and elevation call for them.
Bring at least one dry pair of socks for sleeping and a spare pair for the trail if conditions are wet or the route is long. Your footwear should already be broken in and comfortable with the socks you plan to wear. Do not use a first overnight trip to test new boots, a new pack and a new sleep system all at once.
Headlamp, first aid and emergency items are not optional extras
Darkness arrives even when the plan is to reach camp early. Carry a headlamp for each person, check its charge or batteries, and know how to lock the switch so it does not turn on in the pack. A phone flashlight is not a replacement: it ties up the phone you may need for navigation and emergency contact.
A small first-aid kit should be built around the people and route. Include blister care, dressings, antiseptic or wound-cleaning supplies, any personal medication and the items you know how to use. A large prepacked kit is not automatically better if it contains many items you cannot identify and lacks the medication or blister supplies you actually need.
The National Park Service's Ten Essentials provide a useful framework: navigation, sun protection, insulation, illumination, first aid, fire, repair tools, nutrition, hydration and emergency shelter. Adapt the list to the route; do not treat it as a fixed shopping bundle.
4. Six products worth considering
These examples were selected independently for the jobs a first-time backpacker actually needs to solve: carrying a weekend load, pitching a dependable shelter, staying warm, insulating from the ground, boiling water and treating drinking water. We checked current manufacturer specifications, product manuals or support information, Amazon US product identifiers and independent editorial testing where available. TestedWise has not field-tested these products. They are examples, not a required shopping list; exact variants and availability can change, so confirm the model and size on the live listing before checkout.
| Product | Best role | Useful detail | Main trade-off |
|---|---|---|---|
| Osprey Rook 50 | Supportive framed pack for a bulky first kit | Adjustable AirSpeed torso system, hip-belt pockets and integrated rain cover | Heavier than minimalist packs; capacity differs between some current product pages and retailer listings |
| MSR Elixir 2 | Durable, easy-to-pitch two-person shelter | 3-season freestanding design, two doors, two vestibules and footprint included | About 5 lb 2 oz minimum trail weight; best split between two hikers |
| Kelty Cosmic Down 20 | Three-season down sleeping bag for a regular-size sleeper | 550-fill down; regular size weighs about 2 lb 7 oz; 20°F label | Its ISO comfort figure is around 31°F, not 20°F; protect down from moisture |
| Therm-a-Rest NeoAir XLite NXT Regular | Compact insulated air pad | R-value 4.5 and 3-inch thickness | Premium-priced and needs care against punctures; standard width may feel narrow |
| MSR PocketRocket 2 | Simple canister stove for boiling water and basic meals | 2.6 oz minimum weight; manufacturer test boils 1 L in 3.5 minutes | Fuel canister and pot are separate; small burner is not a full camp kitchen |
| Sawyer Squeeze SP129 | Flexible squeeze filter for known backcountry water sources | 0.1-micron absolute hollow-fiber membrane; compatible with included pouches and standard 28 mm bottles | Does not remove viruses or chemical contaminants; pouch and filter need correct care |
1. Osprey Rook 50: a supportive pack for a first full kit
Model 10005869 · ASIN B0C62BT41Q · Amazon listing: 50 L · about 3.6 lb
The Rook 50 is a framed backpack with an adjustable AirSpeed back panel, a hip belt, a sleeping-bag compartment, side pockets and an integrated rain cover. That combination makes it a straightforward option for someone who wants a supportive pack rather than a frameless ultralight design. This Amazon listing is the men’s-fit Rook; Osprey also makes a women’s-specific Renn 50. Treat those labels as fit starting points, not rules—torso length, hip shape and how the loaded pack feels should decide which one works. The Amazon listing for this ASIN identifies the 50-liter model and lists a 3.6-pound item weight; Osprey describes a ventilated suspended back panel and a ladder-style torso adjustment on its current Rook 50L product page.
There is one detail worth checking before purchase: Osprey's current U.S. Rook 50L page displays a 56-liter volume, while the older Rook 50 S24 specification and this Amazon listing show 50 liters. Treat the Amazon ASIN as a specific listing, not proof that every Rook 50 generation has identical measurements. Confirm the exact model year, capacity, torso fit and load range on the selected offer.
- Best for: a beginner who wants an adjustable, framed pack and expects to carry a fairly bulky first kit.
- Think twice if: your gear is compact and you want the lightest possible overnight setup. A 30–45-liter pack may be enough.
- Before checkout: confirm Model 10005869, ASIN B0C62BT41Q, the selected volume and whether the pack's one-size torso adjustment fits your body. Try it loaded if possible.
2. MSR Elixir 2: a sturdy first two-person tent
Model 13699 · ASIN B0DN3RSZC8 · 2-person · 3-season · 5 lb 2 oz minimum trail weight
The Elixir 2 is a freestanding two-person tent with two doors, two vestibules and a rectangular floor that gives two hikers room for their sleeping pads. The current model includes a footprint, poles, rainfly and stakes. MSR positions the Elixir series as a versatile shelter for newer backpackers and people who want a durable, easy-to-pitch tent. The current MSR Elixir 2 product information lists a 30-square-foot floor, 41-inch peak height and 5 lb 2 oz minimum weight; the packaged weight is higher once all included parts are counted.
Its main compromise is weight. It is not an ultralight tent, and carrying the entire tent alone makes less sense than splitting the body, fly, poles and footprint between two people. For a short first trip, the extra fabric and conventional freestanding pitch can be easier to manage than a more specialized shelter. Practice the pole layout and guyline setup at home, and use all required stakes and guylines when wind is possible.
- Best for: two beginners who value a familiar freestanding pitch, durable materials, two doors and covered gear storage.
- Think twice if: you hike solo, cover long distances or are trying to keep pack weight very low. A lighter one-person shelter may make more sense.
- Before checkout: confirm Model 13699 and ASIN B0DN3RSZC8, and check that the current package includes the footprint. Do not assume older Elixir versions have the same fabric or included accessories.
3. Kelty Cosmic Down 20: a practical down bag with a rating caveat
Model 35413724RR · ASIN B0CSPKCJZK · 550-fill down · Regular: 2 lb 7 oz
The Cosmic Down 20 is a semi-rectangular down sleeping bag with 550-fill insulation, a draft collar, a full-length draft tube and a roomier footbox. Kelty lists the regular size for sleepers up to 6 feet, with a 2 lb 7 oz weight and an 8 × 13-inch stuff-sack size. Those dimensions make it easier to fit into a backpack than a bulky car-camping bag. See Kelty's current Cosmic Down 20 specifications.
The number in the name needs context. REI's current technical listing gives the regular Cosmic 20 an ISO-tested lower limit of 21°F and an ISO comfort rating of about 31°F. That means a cold sleeper should not treat “20°F” as a promise of comfortable sleep at 20°F. Choose by the comfort rating if you sleep cold, and remember that your pad, clothing, shelter, humidity and personal metabolism all affect warmth. Down also needs to stay dry; use a pack liner or dry bag and air the bag out after the trip.
- Best for: a beginner who wants a compressible down bag for mild-to-cool three-season trips and has checked the expected overnight low.
- Think twice if: you sleep cold, expect sustained damp conditions or need a bag for temperatures near 20°F. Consider a warmer comfort rating or a synthetic option.
- Before checkout: confirm the regular size, model 35413724RR and ASIN B0CSPKCJZK. Short, regular and long sizes have different weights and fit limits.
4. Therm-a-Rest NeoAir XLite NXT: a warm, compact air pad
Regular size · SKU 14010 · ASIN B0CS4NHPVP · R-value 4.5 · 3 in thick
The NeoAir XLite NXT is an insulated air pad for backpackers who want to keep packed volume down without giving up much warmth. Therm-a-Rest lists an R-value of 4.5, a 3-inch thickness and a 13-ounce weight for the Regular size. The regular size is about 20 × 72 inches; the standard width is efficient to pack but may feel narrow if you sleep on your side or move around. The manufacturer's NeoAir XLite NXT product page provides current sizes and specifications.
This is a premium air pad, not a requirement for a first trip. A less expensive self-inflating or closed-cell foam pad can work if its insulation and packed size suit the trip. The XLite's advantage is the balance of warmth and compactness; its trade-offs are price, a narrower standard width and the need to protect it from sharp objects. Use the included pump sack or inflation method, carry the repair kit and test the valve before leaving.
- Best for: hikers who want a compact, insulated pad for cool three-season nights.
- Think twice if: you prefer a wide sleeping surface, are rough on inflatable gear or want the lowest-cost option. Compare the Regular Wide size and foam alternatives.
- Before checkout: confirm the NXT generation, Regular size, SKU 14010 and ASIN B0CS4NHPVP. Do not confuse it with the older NeoAir XLite or the Regular Wide version.
5. MSR PocketRocket 2: a simple stove for boil-and-eat meals
Model 09884 · ASIN B01N5O7551 · 2.6 oz minimum weight
The PocketRocket 2 is a small canister-top stove suited to boiling water and cooking simple one-pot meals. MSR lists a minimum stove weight of 2.6 ounces, a packaged weight of 3.7 ounces and a manufacturer test boil time of 3.5 minutes for one liter using MSR IsoPro fuel. The manufacturer also lists about 60 minutes of burn time per 8-ounce canister under its test conditions. These are controlled product figures, not a guarantee for cold, wind or every pot and fuel brand. See the MSR PocketRocket 2 specifications.
The stove is only one part of a cooking setup. You still need a compatible fuel canister, a stable pot, a lighter or other ignition source and a plan for carrying the fuel. The canister is not included with the stove. Check whether the destination allows canister stoves and whether compatible fuel can be purchased near the trailhead.
MSR displays a California Proposition 65 warning on the product page because brass can expose users to lead if the material is damaged or disrupted. A Prop 65 warning does not by itself mean that a product is unsafe, but read the notice and avoid damaging or altering the burner. Always use a stove outdoors in a well-ventilated area, on a stable surface, away from dry vegetation. Never operate it inside a tent, vestibule or enclosed shelter: the CDC warns that portable gas camp stoves can cause dangerous carbon-monoxide buildup indoors, and opening the tent does not make indoor use safe. Read the CDC carbon-monoxide safety guidance before using fuel-burning equipment.
- Best for: solo hikers or pairs who mainly boil water for dehydrated meals, coffee, oatmeal or simple one-pot food.
- Think twice if: you want to cook elaborate meals for a group or need a stove that performs well in severe cold and wind without a more specialized system.
- Before checkout: confirm Model 09884 and ASIN B01N5O7551. Budget separately for a compatible canister, pot and ignition source.
6. Sawyer Squeeze SP129: a flexible water-filter setup
Model SP129 · ASIN B00B1OSU4W · 0.1-micron absolute hollow-fiber membrane
The SP129 kit is a squeeze-style filter system that can be used with its pouches, compatible 28 mm threaded bottles or a suitable hydration setup. Sawyer describes the membrane as a 0.1-micron absolute hollow-fiber filter and publishes reduction claims for bacteria and protozoa. The filter itself weighs about 3 ounces; the complete kit is heavier because it includes pouches, adapters and cleaning parts. Check the exact bundle and follow the Sawyer Squeeze instructions and specifications.
A filter is not automatically a purifier. The CDC notes that most portable filters do not remove viruses. Sawyer's standard Squeeze is not designed to remove viruses, dissolved chemicals or salt. Where virus contamination is a concern, follow current public-health guidance for boiling or an appropriate disinfection step after filtering. If water may contain fuel, agricultural chemicals, mining runoff or other chemical pollutants, find another source; ordinary backcountry filters do not make chemically contaminated water safe.
Learn to backflush the filter, inspect the pouch seams and keep the filter from freezing after it has been wetted. A frozen wet hollow-fiber filter can be damaged internally without obvious external signs. If you are comparing formats and limitations, see our separate backpacking water filter comparison.
- Best for: hikers who want a flexible filter for known freshwater sources and can maintain the pouch and filter correctly.
- Think twice if: the route's water sources are chemically contaminated, virus risk is known or likely, or you need a treatment method that works without squeezing and backflushing.
- Before checkout: confirm SP129 and ASIN B00B1OSU4W. Check that the kit includes the pouches and adapters you intend to use.
5. Food, water and cooking without guesswork
Plan meals before you decide how much cooking gear to carry
For one night, a simple menu is easier to pack and less likely to leave you with unused food. Think in meals: a trail lunch or snacks on the way in, dinner at camp, breakfast before leaving, and enough snacks for the hike out. Add a little extra food in case the route takes longer than expected. Choose foods you already know you can eat while walking and after a long day; a first trip is not the time to test an unfamiliar recipe that requires several pans.
Dehydrated meals, instant oatmeal, tortillas, nut butter, trail mix, bars and dried fruit are common options because they are compact and need little preparation. Repackage food where practical, but label it clearly with the contents and cooking instructions. Keep wrappers, crumbs and food scraps in your trash bag and pack them out. In bear country, food storage rules apply to trash and scented items as well as meals.
Carry water for the gaps between known sources
There is no universal number of liters that works for every hiker. Temperature, humidity, elevation, exertion, body size, route length and refill points all matter. Study the route's water information, identify reliable sources and carry enough capacity to cover the distance between them with a sensible reserve. A dry creek on a map is not a dependable water source.
Water from a clear stream can still contain pathogens. Choose a treatment method suited to the likely contaminants, use it exactly as directed and keep clean water separate from untreated water. A filter that removes bacteria and protozoa may not remove viruses. The CDC's water-treatment guidance for hiking and camping explains the difference between filtering, boiling and disinfection.
Use a stove only if your meal plan needs one
A no-cook dinner can be a sensible first-trip choice where food safety, weather and local rules allow it. If you use a stove, test it at home, check the canister connection, pack the correct fuel and know how to turn it off. Do not cook inside the tent or vestibule, even with the doors open. Carbon monoxide has no reliable smell or warning, and a tent is not a safe cooking space.
Follow the stove and fuel manufacturer's instructions, keep the burner away from dry grass and leaves, and check fire restrictions before leaving. Some places prohibit open flames or require a specific stove type. A lightweight canister stove is convenient, but a small burner is not a reason to ignore wind, unstable ground or local restrictions.
6. Navigation, safety and food storage
Carry more than one way to understand where you are
Download the route map for offline use before leaving home. Keep the phone charged and protected, but do not make it the only navigation tool. A paper map and compass are useful backups only if you know how to read them. For a remote route, learn the route's junctions, bailout points and turnaround time before starting.
Tell a trusted person the trailhead, intended route, campsite and expected return time. Agree on what they should do if you do not check in. On routes without dependable cell service, consider a satellite messenger or personal locator beacon that suits the area and your budget. Learn how to use it before an emergency.
Make the first-aid kit match the people on the trip
At minimum, plan for blisters, minor cuts, scrapes, pain relief you can safely take, personal medication and basic wound care. Add supplies for known allergies or medical needs. A prepacked kit is a starting point, not a substitute for judgment or training. Keep it dry and make sure someone in the group knows where it is.
Check bear and wildlife rules for the exact destination
Food storage rules are not the same across the United States. One area may require a hard-sided bear canister; another may provide lockers or permit a specific hanging method. Do not assume that a generic stuff sack or a rope around a tree meets the local rule. Check the land manager's current guidance before leaving. The National Park Service explains that food, trash, toiletries and other scented items may all need secure storage, and that requirements vary by park in its bear food-storage guidance.
Where a canister is required, confirm that the exact model is approved for that area and large enough for food, trash and scented toiletries for the whole trip. Store it where and how the local authority instructs. Do not leave food or scented items in the tent just because the campsite looks quiet.
Pack out waste and follow the local toilet rules
Human-waste rules vary by ecosystem and land manager. Some places allow a cathole in suitable soil; others require a waste bag or designated toilet. Where catholes are allowed, follow the local depth and distance requirements, and stay well away from water, trails and campsites. Pack out toilet paper and hygiene products unless the area explicitly allows another method. Leave No Trace's Dispose of Waste Properly guidance explains why local rules and packing out waste matter.
7. How to pack and test your kit
Pack the items you need during the day where you can reach them without emptying the bag. Keep heavy items close to your back and centered, not dangling from the outside. Put soft, less-used items such as the sleeping bag near the bottom; place heavier food and cooking items near the middle of the pack; keep rainwear, snacks, water treatment, map, headlamp and first aid accessible. The exact layout depends on the pack design and your comfort, so walk with it loaded and adjust.
Do a home shakedown before the trailhead
- Lay everything out. Put every item on the floor and compare it with the checklist. Remove duplicates and add the things you actually need for the route.
- Test the shelter. Pitch the tent, check every pole and clip, stake it out and make sure the rainfly fits. Learn how to pack it away when wet.
- Test the sleep system. Inflate the pad, check the valve and repair kit, and sleep in the bag with the clothes you plan to wear.
- Test the stove and filter. Use them according to the manuals, check all connections and practice cleaning the filter. Do not wait until camp to discover a missing adapter or fuel canister.
- Load the pack and walk. Use the actual food, water containers and shared gear. Walk on a local trail or around the neighborhood long enough to notice rubbing, pressure points and balance problems.
- Repack after the test. Fix fit issues, move frequently used items, and write down anything you forgot or never touched.
Understand base weight and total pack weight
Backpackers often use base weight to describe the weight of the pack and gear before food, water and fuel are added. Consumable weight is the food, water and fuel you use during the trip. Total pack weight is what you actually carry at the start, including those consumables. This distinction helps explain why two people with the same tent and sleeping bag can leave the trailhead with very different loads.
There is no single base-weight target that makes a beginner safe or experienced. A comfortable, correctly fitted load that you can walk with on the planned terrain is more useful than chasing an arbitrary number. Weigh the kit, identify the heaviest items and decide whether a lighter alternative would solve a real problem. Do not remove navigation, insulation, water treatment or emergency supplies just to make the scale look better.
8. What you can leave at home on a first overnight
Many first-time backpackers pack as if they are setting up a small house in the woods. That is understandable, but it creates a heavy bag and makes it harder to find what matters. For a simple one-night trip, you can often leave these behind:
- Camp chairs and large tables: a sit pad or a suitable log or rock is usually enough where permitted.
- Multiple changes of clothes: carry a dry sleep layer and weather protection rather than a complete outfit for every hour.
- Large cookware sets: one pot and one spoon can be enough for a simple menu. Do not pack a full car-camping kitchen.
- Heavy car-camping tents and air mattresses: they may be comfortable at a drive-up campsite but are bulky and heavy to carry.
- Extra gadgets and oversized tools: bring repair items that solve likely problems, not a drawer of tools you do not know how to use.
- Unnecessary camp shoes: optional comfort items are worth their weight only if they make a meaningful difference to you.
Do not confuse “leave at home” with “leave out the safety basics.” A headlamp, navigation, first aid, weather layers, water treatment and a suitable emergency plan belong on the list even when the route is short.
9. Beginner backpacking FAQs
What gear do I need for my first overnight backpacking trip?
Start with a fitted backpack, backpacking shelter, sleeping bag, insulated sleeping pad, weather-appropriate clothing, food, water containers and treatment, navigation tools, headlamp, first aid, sun protection, emergency supplies and the food-storage system required by the destination. Add a stove and cookware if your meal plan needs them. The route, forecast and local rules determine the final list.
What size backpack is best for one night of backpacking?
REI places efficient weekend packing for one to three nights in roughly the 30–50-liter range. A beginner with bulky or borrowed gear may need the upper end; a compact kit may fit in less. Torso length and hip-belt fit matter more than the capacity printed on the bag.
How heavy should my first backpack be?
There is no single safe weight target for everyone. Fitness, body size, terrain, trip length, pack fit and the weight of shared gear all matter. Weigh the complete load, practice with it before the trip and reduce duplicate or unnecessary items without removing safety equipment.
Can I use a regular camping tent for backpacking?
Only if its packed weight, size and design make sense to carry. Many car-camping tents are much heavier and bulkier than backpacking tents. Compare complete packed weight, poles, stakes, footprint, weather protection and how the tent fits your group.
Is a 20-degree sleeping bag warm enough for a first trip?
It depends on the expected overnight low, your sleep temperature, clothing and sleeping-pad insulation. Check whether the rating is an ISO comfort or limit rating. For a cold sleeper, the comfort rating is the more useful reference; a bag advertised as 20°F may not keep every person comfortable at 20°F.
Do I need trekking poles for an overnight hike?
No. Trekking poles are optional. They can help with balance on uneven ground, steep descents and when carrying a heavier pack, but they are not a substitute for good footwear, route planning or careful footing. If you plan to use them, practice adjusting and planting them before the trip. Our trekking poles for hiking guide explains how to choose the length, material and locking system.
How much water should I carry while backpacking?
Plan around the distance between reliable water sources, weather, exertion and your own needs. Check the route's current water information and carry enough capacity for the longest gap plus a sensible reserve. Treat natural water before drinking it; clear appearance does not establish safety.
Is a Sawyer Squeeze enough to make backcountry water safe?
The Sawyer Squeeze is a microfilter designed to reduce bacteria and protozoa, but it does not remove viruses or chemical contaminants. Use a treatment method suited to the source and local risk. The CDC explains when boiling, filtering and disinfection are appropriate.
Do I need a bear canister for every overnight backpacking trip?
No single rule applies everywhere. Some parks and wilderness areas require an approved bear-resistant canister; others provide food lockers or allow specific hanging methods. Check the current land-manager rules for the exact trail and campsite, and include trash and scented toiletries where required.
Should I buy all my backpacking gear before the first trip?
No. Borrow or rent expensive items when practical, especially a pack, tent or sleeping bag, but make sure the equipment fits and is appropriate for the forecast. Buy the items that affect safety and fit first, test everything at home, and upgrade after you know what actually needs to change.
Related guides
- Beginner Hiking Mistakes: 10 Common Errors & Fixes — footwear, weather, navigation and day-hike decisions that still matter on an overnight trip.
- Best Backpacking Water Filters: Katadyn vs Sawyer vs Membrane Solutions — compare filter formats and understand what each treatment method does not remove.
- Best Portable Power Stations for Camping & Home Backup — useful for car-camping or basecamp power planning, not a substitute for a lightweight backpacking power bank.