
The right trekking poles should fit your body, suit the ground you hike on and feel natural after a few minutes on the trail. For most first-time buyers, a pair of adjustable aluminum poles with external lever locks is a practical place to start: you can set the length at home, shorten the poles for climbs and lengthen them for descents. Carbon and folding designs can save weight or pack smaller, but they are not automatically better. This guide explains how to choose trekking poles for hiking, size them correctly and use them without fighting your natural stride.
Affiliate disclosure: This article contains affiliate links. TestedWise may earn a commission if you purchase through them, at no additional cost to you. Read the full disclosure.
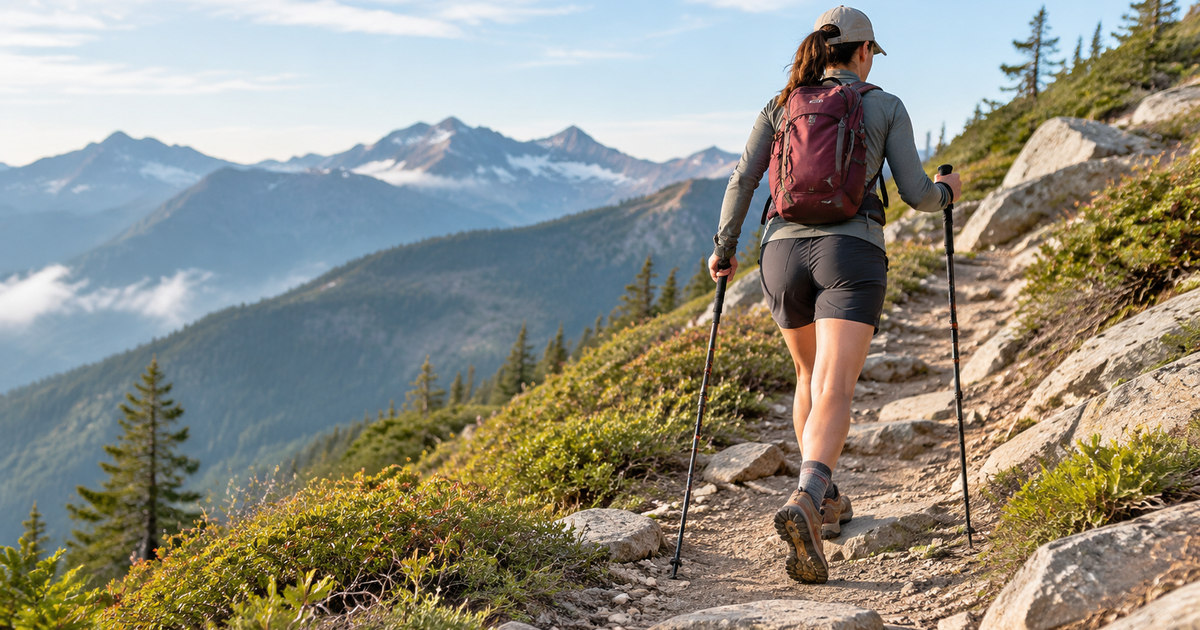
This guide is for day hikers and weekend backpackers on established trails in ordinary three-season conditions. It covers the choices that matter most before buying and the basic technique that helps poles work as intended. It is not a guide to ski touring, technical mountaineering, avalanche travel or using trekking poles as a medical mobility aid. If you are still planning your first route, our beginner hiking mistakes guide covers the wider preparation decisions; for an overnight trip, start with the beginner backpacking gear checklist.
1. What trekking poles actually help with
Trekking poles give you extra points of contact with the ground. Used well, they can make it easier to keep your balance on uneven trails, maintain a steady rhythm on climbs and feel more controlled when stepping down from rocks or roots. They are especially useful when the trail is steep, the surface is loose, or you are carrying a loaded backpack.
On an uphill, poles let your arms contribute to the movement instead of asking your legs to do every part of the work. On a descent, planting a pole before a step can help you stay upright and share some of the initial load through your hands and upper body. On a traverse, one pole can be shortened and the other lengthened so your arms are not forced into awkward positions.
That does not mean poles make every hike easier or remove the risk of a fall. A pole tip can slip on wet rock, catch between roots or become awkward when you need both hands for a scramble. Poorly adjusted poles can also make your shoulders tense. The benefit comes from choosing suitable terrain, setting the length correctly and learning to plant the tips without overreaching.
Think of trekking poles as a balance and movement tool, not a guarantee against knee pain or injury. They may help some hikers manage effort on long descents, but the result depends on your technique, fitness, pack weight and the route. If you are buying equipment to manage a medical condition or persistent pain, get advice from a qualified professional rather than treating hiking poles as a substitute for a cane, crutches or another mobility aid.
2. Should you use one hiking staff or a pair of trekking poles?
A hiking staff is one pole. Trekking poles are normally sold as a pair and used together. Neither choice is right for every person, but the difference is straightforward: one staff leaves a hand free, while a pair provides more balanced support on both sides of your body.
When one pole is enough
A single staff can suit relatively flat paths, short walks with a light pack or hikers who want occasional balance support without carrying two poles. It can also be convenient if you need one hand free for a leash, camera or another task. The trade-off is that the support is concentrated on one side, so you may need to switch hands or change how you plant it as the trail changes.
When a pair makes more sense
Two poles are the more versatile choice for steep or uneven trails, longer descents, stream approaches and hikes with a heavier pack. They make it easier to develop an alternating rhythm and provide support on either side when the trail tilts or the footing changes. If you are buying one set for general hiking and do not have a specific reason to prefer a staff, a pair is the safer all-round choice.
There is no need to use both poles every minute. You can shorten them and carry them when the trail is smooth, tuck them away before a scramble or use one briefly while negotiating a simple step. The point is to have the support available when it is useful, not to force a pole plant into every stride.
3. Telescoping, folding or fixed-length: which design should you choose?
The way a pole collapses affects its packed size, adjustment range and the number of moving parts. This decision is often more important than the brand name printed on the shaft.
| Design | How it works | Best fit | Main trade-off |
|---|---|---|---|
| Telescoping | Two or three shaft sections slide into one another and lock at the chosen length | General hiking, mixed terrain and first-time buyers who need length adjustment | Usually packs longer and can weigh more than a compact folding pole |
| Folding / Z-pole | Short shaft sections fold together around an internal cord, then lock into position | Travel, trail running, fast hiking and hikers who want poles to fit inside a pack | Some models have limited adjustment; assembly and cable wear are additional considerations |
| Fixed length | The pole folds for storage but does not change its working length | Experienced hikers who know their preferred length and value minimum weight | Less adaptable to steep climbs, descents, side slopes or sharing between people |
Telescoping poles: the most flexible starting point
Telescoping poles are usually the easiest recommendation for a first pair. They let you fit the pole to your arm length and make small changes when the trail climbs or drops. A three-section design also gives you a useful way to pack the poles on the outside of a backpack. The downside is that the collapsed length can be around two feet or more, which may be too long for a small daypack or carry-on bag.
Folding poles: choose them for packability, not because they look simpler
Folding poles collapse into several short sections, much like a tent pole. They are usually quicker to stow and take up less space inside a pack. Some folding models also adjust through an external lever or a short sliding section, while others are fixed-length. Check that distinction before you buy: “folding” describes how a pole packs, not whether you can change its hiking length.
Folding designs can take a little practice to assemble. The internal cord and joining points also need to be kept clean and checked for wear. If you expect to adjust your poles repeatedly on a steep route, a conventional telescoping model may be less fiddly.
Fixed-length poles: light, but less forgiving
Fixed-length poles remove adjustment hardware and can be extremely light. That is attractive to trail runners, fastpackers and long-distance hikers who already know their preferred size. The trade-off is real: you cannot shorten them for a long climb, lengthen them for a descent or easily lend them to someone of a different height. For a first pair, adjustability is usually worth the small weight penalty.
4. Aluminum vs. carbon fiber trekking poles
The shaft material affects weight, price and how a pole behaves when it takes a hard hit. Aluminum and carbon fiber can both work well; the right choice depends on the terrain and how carefully you want to manage your gear.
| Material | Why hikers choose it | What to keep in mind |
|---|---|---|
| Aluminum | Generally more affordable, durable and tolerant of knocks; a bent shaft may still be usable long enough to get off the trail | Usually heavier than comparable carbon poles; a badly bent section may no longer collapse or lock correctly |
| Carbon fiber | Lower weight and good vibration damping; attractive when you carry poles for many hours or count every ounce | Costs more and can be more vulnerable to cracking or splintering under a sharp impact or overload |
| Hybrid carbon / aluminum | Combines lighter upper sections with more impact-tolerant lower sections on some designs | Check which sections use each material rather than assuming the whole shaft is carbon |
For most casual hikers, aluminum is a sensible default. REI's buying guide describes aluminum as the more economical and durable option: it can bend under high stress but is less likely to break outright. Carbon-composite poles are lighter and can reduce vibration, but are more vulnerable to breakage or splintering under high stress. That matters if you often hike on rough ground or tend to lean heavily on your poles.
Carbon is not automatically fragile, and aluminum is not indestructible. A carbon pole can last for years when used within its limits; an aluminum pole can become unsafe if it is badly bent, dented or damaged at a joint. Avoid putting your full body weight on a pole as if it were a fixed handrail, and inspect the shaft after a hard impact.
5. Grips, straps, locks, baskets and tips: the details that change comfort
Two poles with similar shafts can feel very different in your hands. If possible, hold a few designs before buying. Grip shape, strap adjustment and the way the lock works are the details you notice on every mile.
Grip material: cork, foam or rubber
- Cork: A comfortable option for long days and warm weather. It manages moisture and can gradually conform to the shape of your hand. Cork is a good starting point if your hands sweat easily.
- Foam: Soft to hold and good at absorbing moisture. Foam grips can be comfortable in a wide range of conditions, although some hikers find them less durable than cork.
- Rubber: Insulates hands in cold weather and can feel secure with gloves. In warm conditions, sweaty skin may rub against rubber and become uncomfortable.
Some poles have an extended grip below the main handle. That extra section is useful on a short, steep pitch because you can move your hand lower without stopping to change the pole length. It is a practical feature if your routes climb and drop repeatedly.
Wrist straps: useful only when adjusted correctly
A strap should support your hand, not cut into your wrist. Look for a strap that is easy to lengthen or shorten and that does not twist when you put it on. Padded or lined straps can help on long days, but the best strap is the one that fits your hand and glove combination.
The usual technique is to bring your hand up through the bottom of the strap, then bring it down over the grip. The strap should sit across the heel of your palm. This lets you keep a relaxed hold instead of squeezing the handle constantly. If a strap is too short, too tight or difficult to release, adjust it before the hike rather than trying to fix it on a steep section.
Locking mechanisms: lever, twist or push-button
Adjustable poles need a lock that holds the selected length. External lever locks open and close like a small clamp and are generally easy to inspect or operate with gloves. Twist locks use an internal expander and can be strong and unobtrusive, but you need to tighten them correctly. Push-button systems are common on folding poles and can make deployment quick, though not every push-button model offers a wide length adjustment range.
Whatever type you choose, check the locks before each hike. A pole that slowly slips shorter under pressure is not set up correctly. On a lever lock, follow the manufacturer's instructions for adjusting clamp tension; do not overtighten it or force the lever closed.
Baskets and tips: match them to the surface
Small trekking baskets help stop the tip from sinking too deeply into soft ground. Larger snow baskets are designed for snow, while mud baskets suit softer, wet trails. A basket is not a substitute for good footing, but using the right size can make a pole more predictable.
Carbide or steel tips provide traction on many dirt, rock and icy surfaces. Rubber tip protectors are useful when poles are packed away and can reduce noise or marking on hard surfaces. Angled rubber walking tips are designed for pavement and other firm ground. Some parks or sensitive trails have specific rules about pole tips, so check local guidance and use protective tips where appropriate.
Do you need shock absorption?
Some poles contain a spring or damping system intended to soften the feel of downhill impacts. It is a preference, not a must-have feature. Standard poles already provide balance and support; shock-absorbing mechanisms can add weight, cost and moving parts. If you are comparing two models, prioritize correct length, grip comfort and a reliable lock before paying extra for an anti-shock feature.
6. How to choose the right trekking pole length
Correct length is more important than a premium shaft material. For general hiking on level ground, set each pole so your elbow bends at roughly 90 degrees when the tip is on the ground near your foot and your hand rests naturally on the grip. This is a starting point, not a rigid rule: arm length, shoulder comfort, footwear and personal preference all matter.
Use this height chart as a starting point for fixed-length poles
| Your height | Suggested fixed pole length | In inches, approximately |
|---|---|---|
| Under 5 ft. 1 in. | 100 cm | 39 in. |
| 5 ft. 1 in. to 5 ft. 7 in. | 110 cm | 43 in. |
| 5 ft. 8 in. to 5 ft. 11 in. | 120 cm | 47 in. |
| 6 ft. and taller | 130 cm | 51 in. |
These ranges are broad estimates, not a substitute for trying the poles. Check the manufacturer's size chart for the exact model. If you are taller than about six feet and buying adjustable poles, make sure their maximum length reaches at least 51 inches (about 130 cm). Some compact models top out below that, even if the grip feels comfortable in the shop.
Set up a three-section pole without losing adjustment range
If your pole has two adjustment points, set the upper adjustment around the middle of its range first. Then use the lower section to bring the pole to your general hiking length. That leaves room to make small changes with the upper lock while walking. Keep every section within the manufacturer's marked minimum and maximum extension; exposing too much of a lower shaft can weaken the setup.
After adjusting both poles, walk for a few minutes on level ground. Your shoulders should stay relaxed, your elbows should not be forced outward and you should not have to shrug to plant the tips. If your shoulders rise or you feel pressure around your neck, shorten the poles slightly. If you are reaching down for the grips, lengthen them.
7. Adjust trekking poles for climbs, descents and traverses
One reason adjustable poles are useful is that the ideal length changes with the slope. You do not need to stop for every small rise or dip, but on a long climb or descent a small adjustment can make your posture more comfortable.
- Long uphill sections: Shorten each pole by about 5–10 cm (2–4 inches). This helps you plant the tip securely without lifting your shoulders toward your ears. The steeper the climb, the more you may need to shorten them.
- Long downhill sections: Lengthen each pole by about 5–10 cm (2–4 inches) from your normal setting. The extra reach can help you stay more upright and place the tip before stepping down.
- Traversing a side slope: Shorten the pole on the uphill side and lengthen the one on the downhill side as needed. This keeps your arms closer to a comfortable position.
- Rolling terrain: Make smaller changes only when they improve your stride. Constantly adjusting the poles can be more distracting than helpful on a trail with short, gentle rises.
These measurements are useful starting points. If a change makes your shoulders tense or causes you to reach too far, use a more comfortable setting. The pole should support your movement, not dictate it.
8. How to use trekking poles on the trail
There is a short learning curve, but you do not need a complicated technique. Start on a smooth path and let your arms move naturally. Once the rhythm feels comfortable, use the poles on gentle hills before taking them onto rocky or steep terrain.
Wear the straps and hold the grips properly
Put your hand up through the bottom of the strap, then bring it down so the strap rests across the heel of your palm. Hold the grip lightly. You should not need to squeeze hard to keep the pole in place. Adjust the strap so you can relax your fingers while still controlling the handle, and check that left- and right-hand straps are on the correct sides if the model is shaped that way.
Find the opposite-foot rhythm
On level ground, plant the left pole as your right foot steps forward, then the right pole as your left foot moves. The opposite-foot pattern is similar to a natural arm swing. Keep the tips fairly close to your body and angle them slightly behind you as you push off. Do not stab the poles far ahead or drive them straight down with locked elbows; that can jar your arms and shoulders.
If you lose the rhythm, lift the poles for a few steps and start again. There is no need to force the pattern when the trail becomes narrow or technical. You can also plant both poles together for a short, steep step if that feels more stable, then return to the alternating pattern when the ground allows it.
Use a controlled plant on descents
On a descent, place the pole before committing your weight to the next step. Keep your elbow slightly bent and avoid reaching so far ahead that your shoulder is pulled forward. Let the pole help you balance and control the step; do not use it as a rigid anchor or lean your full body weight onto a tip that may slide.
Know when to put the poles away
Stow your poles before a section that requires both hands, such as a scramble, ladder, narrow exposed step or a climb where you need to hold the rock. A pole dangling from your wrist can catch on brush or rock when you need to move quickly. If you have to carry the poles, secure them to your pack so the tips and handles cannot swing into another person.
For a stream crossing, slow down and assess the current, depth and exit before stepping in. Poles can provide extra contact points on a suitable crossing, but they do not make fast or deep water safe. If the crossing is beyond your ability, find a safer route or turn around.
9. Choose trekking poles for the hikes you actually take
Before comparing models, think about your usual route. A pair for a short local loop does not need the same weight or packability as poles for a multi-day backpacking trip. Use the table below to narrow the design first, then compare fit, grip and lock details.
| Your hiking style | What to prioritize | What you can probably skip |
|---|---|---|
| Occasional day hikes | Adjustable aluminum shafts, simple locks, comfortable grips and a useful length range | Premium carbon construction and specialist ultralight features |
| Steep or rocky trails | Reliable locks, durable shafts, secure straps, grip extensions and suitable baskets | Fixed-length poles if you need to change length often |
| Weekend backpacking | A balance of weight, comfort, adjustability and a packed length that fits your pack | Paying extra for the lightest pole if the weight saving is small for your kit |
| Travel and small daypacks | Folding poles with a compact packed length and a length range that fits your height | Long telescoping models that cannot fit inside your bag |
| Fast hiking or trail running | Low swing weight, fast deployment and a fixed or adjustable folding design that matches your technique | Heavy all-purpose poles with long collapsed sections |
If you mainly run rather than hike, the priorities change: low weight, quick deployment and secure carry become more important. Our trail running for beginners guide explains how to build a practical day-running kit without buying accessories you do not need.
10. Five trekking poles worth comparing
A search for the best trekking poles can be confusing because roundups sometimes mix adjustable hiking poles with fixed-length trail-running models. These examples cover different construction styles and budgets, so they are grouped by use case rather than ranked as if they were interchangeable. We selected them using manufacturer specifications and independent gear reviews, with attention to the trade-offs a hiker should understand before buying. TestedWise has not field-tested these poles. Confirm the exact size, pair quantity, included baskets and current listing details before checkout; some Amazon pages group multiple lengths or product versions together.
| Model | Useful role | Key detail | Important trade-off |
|---|---|---|---|
| Black Diamond Trail Back | First adjustable all-round pair | 7075 aluminum, three sections, 100–140 cm range and FlickLock adjustment | Longer packed length and more weight than specialist folding poles |
| Cascade Mountain Tech Carbon Fiber Quick Lock | Value-oriented carbon option | 100% carbon shafts, cork grips, quick locks and multiple tip accessories | Still packs to about 26 in.; adjustment can take longer than on premium designs |
| Trekology Trek-Z 2.0 | Budget folding pair for compact storage | Aluminum shafts and about 15 in. folded length on the reviewed version | Heavier and slower to set up than many premium folding poles |
| LEKI Makalu FX Carbon AS | Premium compact adjustable pole | Foldable carbon/aluminum construction, 100–120 or 110–130 cm adjustment | Higher cost and more components; anti-shock is optional, not essential |
| Black Diamond Distance Carbon Z | Ultralight fixed-length folding pole | 100% carbon shafts and a very short folded length | Fixed working length cannot be changed for climbs or descents |
1. Black Diamond Trail Back: a straightforward first pair
Model BD1125524064ALL1 · Amazon ASIN B0CRVSPJXM · Aluminum · 100–140 cm
The Trail Back is a sensible place to start if you want an adjustable pole for day hikes and occasional overnight trips. Black Diamond lists 7075 aluminum shafts, a three-section design, a 100–140 cm working range, FlickLock adjustment, an EVA grip with an extension for alternate hand positions, adjustable webbing straps and replaceable baskets. Extra snow baskets are included, which gives the pair more flexibility if you also hike in winter conditions.
The main advantage is straightforward versatility rather than low weight. The poles collapse to about 61.5 cm, so they are not as easy to tuck inside a small daypack as a Z-fold model. Independent testing also describes them as durable but heavier than specialist lightweight poles. If you want one adjustable pair for ordinary hiking and do not mind carrying them on the outside of your pack, that is a reasonable trade.
- Best for: first-time buyers who want adjustable aluminum poles for mixed day-hiking terrain.
- Think twice if: you count every ounce or need a very short packed length.
- Before checkout: confirm that the listing is the Trail Back pair, not a single pole or a different Black Diamond model, and check that the 100–140 cm range suits your height.
2. Cascade Mountain Tech Carbon Fiber Quick Lock: carbon without a premium price
Cork-grip version · Amazon ASIN B01C60REBO · 100% carbon fiber
This pair is worth comparing if you want carbon shafts but do not want to move straight into a high-priced specialist pole. Cascade Mountain Tech lists a cork-grip version with 100% carbon-fiber shafts, quick-lock height adjustment, tungsten-carbide tips and a one-year manufacturer warranty. The company lists a weight of about 8.1 oz per pole before rubber tips, a collapsed length of 26 in. and a maximum length of 54 in. A carry case and several tip covers or baskets are included.
The useful part of the package is its range of accessories and replaceable parts. The trade-off is that the poles do not pack as small as a folding Z-pole. CleverHiker's 2026 testing also found the height adjustment slower than on more expensive designs and noted that the packed length is relatively long. This is a value-focused carbon option, not an ultralight pole.
- Best for: hikers who want carbon shafts, cork grips and a broad set of included accessories at a more accessible price.
- Think twice if: compact packing or very fast length changes matter more than the initial purchase cost.
- Before checkout: choose the cork-grip pair if that is the version you want; the brand also sells EVA-grip and other carbon variants.
See Cascade Mountain Tech's cork-grip carbon pole specifications.
3. Trekology Trek-Z 2.0: compact storage on a budget
Amazon ASIN B07X6MXH51 · Aluminum folding design · Approx. 15 in. packed length on the reviewed version
The Trek-Z 2.0 is a budget-oriented folding option for hikers who want poles to fit inside a daypack. CleverHiker's 2026 review lists aluminum shafts, EVA foam grips, a pair weight of about 19 oz and a collapsed length of roughly 15 in. The brand's current Trek-Z product information describes 7075 aluminum, metal flip locks, an internal cord system and two adjustable length ranges. The exact size and grip can vary by version, so compare the selected Amazon variant with the manufacturer's current model details.
Packability is the main reason to consider it. The independent review found the poles heavier than many tested models and slower to set up than premium folding designs. The grips and straps are also more basic. For short or moderate day hikes, those compromises may be acceptable; for frequent long-distance backpacking, a lighter and more comfortable pole may be worth the extra cost.
- Best for: occasional hikers who want a compact pair without paying premium-pole prices.
- Think twice if: you need the lightest possible setup or expect to adjust and deploy the poles repeatedly during a long day.
- Before checkout: verify the exact Trek-Z version, grip material and length range. Do not assume every listing titled “Trek-Z” has identical specifications.
4. LEKI Makalu FX Carbon AS: a premium folding pole that still adjusts
Model 1300552 · Amazon ASIN B0F63LSH2M · Carbon / aluminum hybrid · 110–130 cm standard range
The Makalu FX Carbon AS is for hikers who want a compact folding pole but do not want to give up length adjustment. LEKI lists a foldable design with carbon upper sections and aluminum lower sections, an adjustable 110–130 cm or compact 100–120 cm range, an Aergon Air grip, an ELD folding system and Speed Lock 2 Plus external adjustment. The standard version packs to about 40 cm and weighs about 9.1 oz per pole. The AS model also includes LEKI's Dynamic Suspension System.
This is a more specialized, higher-priced design than a basic aluminum telescoping pole. It makes sense when compact storage and lower swing weight matter, while the adjustment range remains useful on changing terrain. The anti-shock system is an extra feature, not a requirement for a good hiking pole. Check the exact size version before ordering; the compact and standard versions have different length ranges and grip dimensions.
- Best for: frequent hikers and backpackers who want a packable, adjustable pole with a premium grip and folding mechanism.
- Think twice if: you only hike occasionally or prefer a simple, lower-cost aluminum pole.
- Before checkout: confirm whether the listing is Makalu FX Carbon AS or the non-AS Makalu FX Carbon, and check the 100–120 cm versus 110–130 cm version.
5. Black Diamond Distance Carbon Z: for hikers who know their length
Model BD11255440071051 · 100% carbon fiber · Fixed length
The Distance Carbon Z is a specialist choice for fast hiking, trail running and long-distance hikers who already know the pole length they want. Black Diamond lists 100% carbon-fiber shafts, a three-section Z-fold design, speed-cone deployment and fixed working lengths from 105 to 130 cm. Depending on size, the pair weighs about 256–296 g and folds to roughly 35–44 cm. The compact packed length makes it easy to carry when the poles are not in use.
The important limitation is in the name of the design: the working length is fixed. You choose the size when you buy, then fold the poles for storage; you cannot shorten them for a sustained climb or lengthen them for a descent. OutdoorGearLab's 2026 review identifies the fixed length as the main compromise and describes the model as a better match for runners or fastpackers who value quick deployment and low weight. For a first hiking pair, an adjustable model is usually more forgiving.
- Best for: experienced hikers, fastpackers and trail runners who know their preferred pole length and prioritize low weight.
- Think twice if: you want one pair for several people, varied steep terrain or your first season using poles.
- Before checkout: choose the correct fixed length. Amazon listings may show a single size or a variation selector; check the actual size in the cart.
11. A quick checklist before you buy
Before choosing a model, check these details on the exact listing rather than relying on the product family name or a comparison chart from another retailer.
- Pair or single: Confirm that the listing includes two poles. Some hiking staffs and replacement poles are sold individually.
- Length range: Make sure the pole reaches your general hiking length without being extended beyond its marked limit. Taller hikers should pay particular attention to maximum length.
- Adjustment type: Decide whether you want quick field adjustments, compact folding or the lowest possible weight. These are different priorities.
- Grip and strap fit: Check that the grip is comfortable in your hand and that the strap can be adjusted for bare hands and gloves.
- Collapsed length and weight: Compare packed length as well as pair weight. A pole that is light in your hand may still be too long to fit inside your pack.
- Included tips and baskets: Check whether the package includes rubber tips, trekking baskets, snow baskets, a storage bag and any replacement parts you may need.
- Warranty and spare parts: Look for replacement baskets, tips, locks or lower sections. A repairable pole can be a better long-term purchase than a cheaper model with no parts support.
Basic care after each hike
Wipe mud and grit from the shafts and locking areas before collapsing the poles. If the poles have been wet, separate the sections where the manufacturer allows it and let them dry before storage. Check that the locks still hold, the tips are secure and the shafts have no cracks, deep dents or bends. Do not lubricate or disassemble a locking mechanism unless the manufacturer recommends it; the wrong lubricant can attract grit or affect the lock.
When packing poles on the outside of a backpack, secure both ends so the tips cannot snag clothing or catch on branches. Use tip protectors when appropriate, and keep the poles away from fragile items inside the pack. A quick inspection before the next trip takes less time than discovering a loose lock halfway up a climb.
12. Trekking pole FAQs
Are trekking poles worth it for ordinary day hikes?
They can be useful, but they are not essential for every route. Poles are most helpful on uneven ground, steep climbs and long descents, or when you are carrying a heavier pack. On a short, smooth path, you may not need them.
Do I need one trekking pole or two?
A single hiking staff can be enough on relatively flat terrain or when you want one hand free. A pair gives more balanced support and is generally more versatile for steep, uneven trails and backpacking. If you are buying one set for general hiking, a pair is the more flexible choice.
What length should trekking poles be for my height?
Start by setting the poles so your elbows bend about 90 degrees when the tips rest on level ground near your feet. Height charts can help when buying fixed-length poles, but body proportions and the manufacturer's size range matter. Test the fit in your hiking shoes if possible.
Should trekking poles be shorter uphill?
Yes. For a sustained climb, shortening each pole by about 5–10 cm (2–4 inches) is a useful starting point. Keep your shoulders relaxed; if you have to shrug or lift your arms unnaturally, shorten the poles a little more.
Should trekking poles be longer downhill?
Usually. Lengthening each pole by about 5–10 cm (2–4 inches) from your normal setting can help you stay upright and plant the tip before stepping down. Make sure you can still reach the grip without leaning forward.
Are carbon fiber trekking poles better than aluminum?
Neither material is better for everyone. Carbon poles are lighter and can reduce vibration, but they cost more and can be more vulnerable to cracking or splintering under a hard impact. Aluminum poles are usually more affordable and may bend rather than break under high stress. Choose based on weight, terrain and budget.
Are folding trekking poles as strong as telescoping poles?
It depends on the model and how it is built. Folding poles pack smaller and can deploy quickly, but they use joints and an internal cord that need care. Telescoping poles usually offer a wider adjustment range and are a practical choice for varied terrain. Compare the exact model's construction and warranty rather than assuming one design is always stronger.
Do trekking poles protect your knees?
Poles can help with balance and may let you share some of the effort of a descent through your arms and upper body. They do not guarantee protection from injury or eliminate knee pain. Correct length, controlled steps and a route suited to your ability still matter.
How should I wear trekking pole wrist straps?
Put your hand up through the bottom of the strap, then bring it down over the grip so the strap rests across the heel of your palm. Adjust it so your hand is supported without being squeezed. The strap should not dig into your wrist or make it difficult to release the pole.
Can I use trekking poles on pavement?
Yes, if the pole manufacturer permits it and you use suitable rubber walking tips. Carbide tips can be noisy and may mark hard surfaces. Keep tip protectors available and check local rules on boardwalks, protected trails and other sensitive surfaces.
Can trekking poles be used as a substitute for a cane?
No. Trekking poles are designed for hiking and are not intended to support a person's full body weight like a medical cane, walker or crutches. If you need a mobility aid or support for a health condition, ask a qualified professional about the right equipment.
Related hiking guides
- Beginner Hiking Mistakes: What to Check Before Your First Trail — plan footwear, weather, water, navigation and the essentials for a day hike.
- Beginner Backpacking Gear Checklist — build a practical kit for a first one- or two-night trip.
- Trail Running for Beginners — choose a route, shoes and carry system for a first day run.