
This kayaking for beginners guide starts with a simple first trip: a stable boat, a paddle that fits, a properly fitted Coast Guard-approved life jacket, suitable clothing, a way to signal for help, and a short route on calm water. You do not need a garage full of accessories. You do need to understand the conditions you are entering, because a warm afternoon can still mean cold water, changing wind, boat traffic, or a difficult return to shore.
Affiliate disclosure: This article contains affiliate links. TestedWise may earn a commission if you purchase through them, at no additional cost to you. Read the full disclosure.
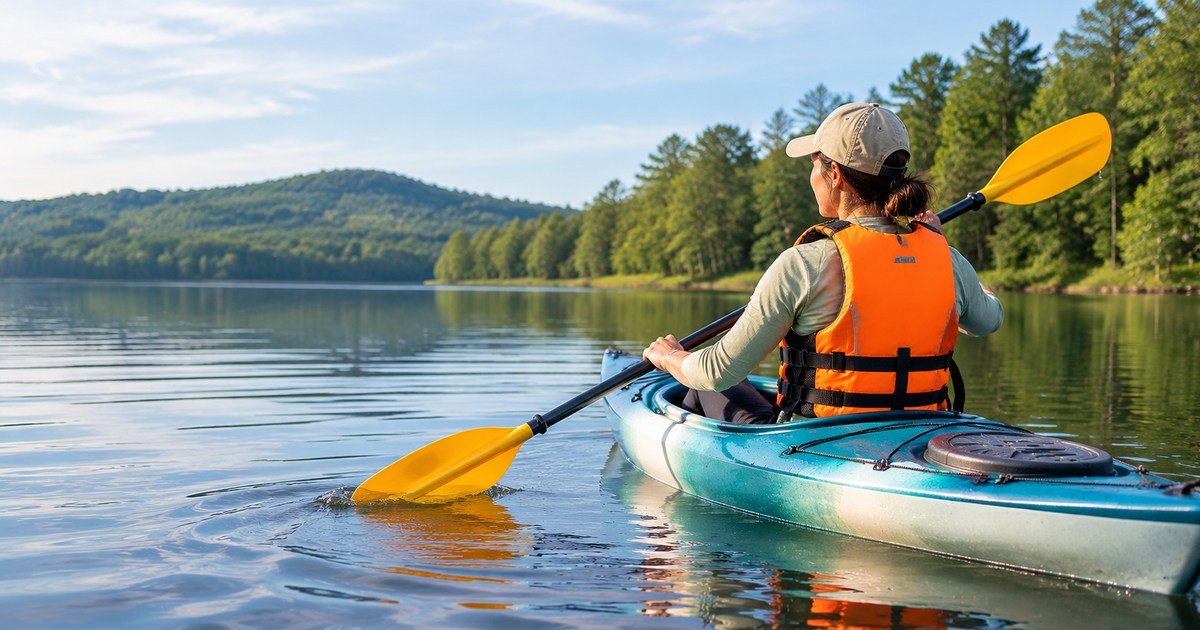
This guide is for beginners planning short recreational trips on sheltered lakes, ponds and similarly protected water. It is not a training manual for whitewater, surf launches, offshore crossings, strong tidal currents or remote sea kayaking. Those environments require different boats, equipment, rescue skills and local knowledge. If your first outing is not on genuinely calm, familiar water, book a guided trip or an introductory class rather than trying to solve the extra risk with more gear.
What you need for your first kayaking trip
It is easy to confuse kayaking essentials with every item sold in a paddlesports shop. For a short, warm-weather outing on a sheltered lake, the core setup is much smaller than a touring or expedition kit. Start with the equipment that keeps you afloat, lets you control the boat, protects you from the conditions and gives you a way to call attention if something goes wrong.
- A suitable kayak: stable enough for your experience, appropriate for the water and within its stated weight capacity.
- A correctly sized paddle: long enough to clear the sides of the boat without forcing an awkward stroke.
- A wearable, U.S. Coast Guard-approved PFD: the right size and activity type, in serviceable condition, and worn while underway.
- A sound signal: a whistle is a compact, practical choice and should be immediately reachable—not buried in a bag.
- Clothing for immersion: quick-drying layers and footwear for warm water; suitable thermal protection when the water is cold.
- Protected essentials: drinking water, phone, keys, medication and a dry layer stored so they stay protected from spray and a wet landing.
- Trip planning: a buddy or guide, a short route, a weather check and a float plan shared with someone on shore.
Many rental outfitters provide the kayak, paddle and PFD. Ask what is included before you arrive, and do not assume that a life jacket handed over at the dock is automatically the right size or fit. A good rental operation should help you adjust the PFD, select a paddle length, explain the launch area and identify local hazards. If staff cannot answer basic questions about conditions or equipment, choose another outfitter.
Rent, borrow or buy: the sensible first step
If you have never paddled before, renting or joining a guided trip is usually a better first purchase than buying a kayak. It lets you learn whether you prefer a sit-on-top or sit-inside design, how much boat width feels comfortable, whether you enjoy paddling for an hour or several hours, and how you manage transport and storage.
Rent when you are still learning
A rental is especially useful when the outfitter can match the boat and paddle to your size and the day's conditions. Ask whether the PFD is U.S. Coast Guard-approved, whether the paddle is the correct length, whether a bilge pump or other safety equipment is supplied when needed, and what the local return time is. Ask for a brief explanation of how to stop, turn, land and get help. A guided beginner trip is worth considering if you are unfamiliar with the waterway or unsure how to respond to a capsize.
Borrow only from someone who can help you prepare
A borrowed kayak can be a low-cost way to try the activity, but the boat must fit the paddler and the trip. Check its maximum capacity, seat and footrest adjustments, drain plugs, hatches, deck lines and general condition. A kayak that is too small, overloaded or unfamiliar can be harder to control than a rental boat selected for beginners. Ideally, the person lending it should go with you and show you how the boat is set up.
Buy after you know what you will paddle
Before buying, think about where the kayak will be used, how it will be transported, where it will be stored, how much weight it must carry and whether you can lift it safely. A wide recreational kayak may feel reassuring on a quiet lake but can be slower and more affected by wind. An inflatable may solve storage and transport problems but needs correct inflation, inspection and care. A long touring kayak may track efficiently but is not automatically the best first boat for a small pond.
Do not choose by the advertised maximum capacity alone. Leave a practical margin for the paddler, clothing, water, safety gear and any other load. Follow the manufacturer's limits and do not treat a boat's capacity as a promise that it will perform well when loaded to the maximum.
Choose a beginner-friendly kayak
For a first recreational outing, the water and the boat should match your skill—not the other way around. On a small, sheltered lake with a gentle launch, a stable recreational kayak is often the easiest place to start. The two common designs are sit-on-top and sit-inside kayaks. Neither is universally better; each changes how you get in, how much water enters the boat and what equipment you need.
Sit-on-top kayaks: simple access and easy drainage
A sit-on-top kayak has a molded seat on an open deck rather than an enclosed cockpit. You sit above the hull, which makes entry and exit straightforward and can feel less confining for a first-time paddler. Scupper holes allow water on the deck to drain. The trade-off is that you should expect to get wet from paddle drip, splashes and water moving through the scuppers. They offer little protection from cold water or wind.
For a warm-weather lake day, a sit-on-top can be a practical rental choice. Check that the seat is comfortable, the footrests are usable and the scupper plugs—if the model uses them—are installed or removed according to the manufacturer's instructions. Do not block drainage openings simply to keep your clothes dry.
Sit-inside kayaks: more protection, more cockpit skills
A sit-inside kayak places your legs inside a cockpit. The hull can shield your lower body from wind and spray, and many models have bulkheads or storage hatches. This can be useful in cooler conditions or on longer trips. The trade-off is that water can collect inside the cockpit if the boat takes on water, and a capsize requires you to know how to exit the cockpit and what to do next.
Before using a sit-inside kayak, learn the wet-exit procedure for that exact boat. A spray skirt should not be worn until you know how to release it and exit the cockpit underwater. A bilge pump and sponge are useful for removing water, but they do not replace capsize practice or rescue skills. If you are new to the activity, learn these skills with an instructor in controlled conditions.
Inflatable kayaks: convenient, but check the details
An inflatable kayak can be easier to store and transport than a hard-shell boat. It is not automatically easier to paddle. Some inflatable designs sit higher in the water and catch more wind; performance, tracking and durability vary widely. Check the manufacturer's recommended pressure, number and placement of air chambers, maximum load, floor construction, repair kit and storage instructions. Inflate it fully to the specified pressure and inspect valves and seams before every outing. Do not use a soft, underinflated boat because it is quicker to prepare.
What makes a first launch easier?
Look for a gently sloping, legal launch area with room to get in without stepping into deep water. A sandy or gently sloping shore is usually easier than a steep, muddy bank, a rocky edge or a busy public dock. Check whether the launch is shared with motorboats, anglers, swimmers or rowing crews. The easiest boat in the world will not make a congested or exposed launch beginner-friendly.
The essential kayaking gear checklist
Use this as a starting list for a short recreational day paddle. The exact kit changes with the boat, water temperature, weather, distance from shore, local rules and whether you are paddling with an outfitter. Items marked conditional are not universal requirements, but they become important for particular boats or trips.
| Item | Priority | Why it matters / what to check |
|---|---|---|
| Kayak suited to the route | Required | Check capacity, condition, drain plugs, hatches, seat and footrests. |
| Correct-size paddle | Required | Match paddle length to your height, kayak width and stroke style. |
| USCG-approved wearable PFD | Required | One for every person; check the approval label, size and condition, then wear it. |
| Whistle or other efficient sound signal | Essential safety item | Keep it attached to the PFD where you can reach it with either hand. |
| Water and snacks | Essential | Bring enough for the route, heat and time on the water, plus a sensible reserve. |
| Dry bag or waterproof storage | Strongly recommended | Protect phone, keys, medication, spare layer and documents; close it correctly. |
| Phone in a separate waterproof case | Strongly recommended | Keep it charged and accessible; do not rely on a dry bag alone for a phone you may need to use. |
| Footwear and sun protection | Essential for conditions | Use secure water shoes or sandals, hat, sunglasses retainer and water-resistant sunscreen. |
| First-aid kit and personal medication | Essential | Pack a small kit in a protected place and carry medication you may need. |
| Bilge pump and sponge | For sit-inside boats / applicable trips | Useful for removing water from an open cockpit; not a substitute for rescue training. |
| Headlamp or white light | Conditional, but wise backup | Carry one if there is any chance of being delayed near dusk; follow navigation-light rules. |
| Spare paddle | Trip-dependent | More relevant on longer, remote or group trips than a short rental outing near shore. |
| Spray skirt, paddle float, towline or VHF radio | Training- and route-dependent | These are not beginner accessories to buy blindly; learn when and how to use them. |
REI's day-touring checklist and the American Canoe Association's Smart Start guidance both emphasize a PFD, paddle, signaling method, water, first aid and protected storage. The ACA also stresses planning, skills and knowing how to use the safety equipment you carry. That last point matters: an unfamiliar rescue tool is not a substitute for instruction.
How to choose and fit a kayak life jacket
A personal flotation device is the one item that should not be treated as optional. Federal recreational-vessel rules require at least one wearable PFD on board for each person, and the device must be used according to its approval label and any referenced owner's manual. State and local rules can add wearing requirements. Federal rules also require children under 13 to wear an appropriate Coast Guard-approved PFD while a recreational vessel is underway, subject to limited exceptions. For kayaking, wearing the PFD is the sensible choice for adults and children even where a local rule only requires adults to carry it.
Look for the actual Coast Guard approval label
Do not rely on a product title that says “life vest,” “buoyancy aid” or “paddling vest.” Check the sewn-in approval label and the manufacturer's information. The label identifies the approval and any conditions or limitations. Older labels may use Type categories, while newer products can use performance Levels. These labels are not interchangeable marketing terms: the U.S. Coast Guard explains that different designs provide different in-water performance and may assume different swimming ability or rescue proximity.
A traditional Type III-style paddling vest is designed to support a conscious wearer in the water; it is not necessarily designed to turn an unconscious person face-up. Read the label rather than assuming that every vest has the same performance. For a first recreational kayak, a foam-filled paddling PFD designed for the activity is often a straightforward choice. Inflatable models require maintenance and may not be appropriate for weak or non-swimmers; the Coast Guard specifically advises users to read the label and follow the device's maintenance requirements.
Fit the vest before you get on the water
Use the chest measurement and weight range printed on the label, not just the shirt size you normally buy. Put the vest on over the layers you expect to wear, close every buckle and zipper, and tighten the adjustment straps evenly. It should feel snug without restricting breathing or paddling movement.
With another person helping, lift gently at the shoulders of the vest. It should not ride up over your chin or ears. If it slides high, looseness may be the issue or the model may not suit your body shape. Try another size or cut. Check the arm openings, shoulder area and lower back while sitting in the kayak; a vest that fits on land but presses against a high-backed seat can become uncomfortable on the water. Never cut, alter or remove flotation components to make a vest fit.
Why a paddling-specific cut can help
A paddling PFD often has larger arm openings and a shorter or shaped lower-back panel to reduce interference with the seat. Pockets can be useful for a whistle, small snack or compact item, but they should not make the vest bulky or change its fit. Bright colors and reflective panels can improve visibility, but visibility features do not replace safe route choice, lights when required or staying clear of boat traffic.
1. Onyx MoveVent Dynamic: a ventilated PFD designed for paddling
Model 1222 · SKU 122200 · U.S. Coast Guard-approved foam PFD · Three adult size groups
The MoveVent Dynamic is a useful example of a paddling-specific vest rather than a general-purpose boating jacket. Onyx lists mesh ventilation in the front and back, a mesh back panel intended to accommodate many canoe and kayak seats, shoulder pads, adjustable side belts, reflective material, a zippered pocket and an included marine whistle. The manufacturer's size chart lists X-Small/Small for 28–36 in. chests, Medium/Large for 36–44 in., and X-Large/2X-Large for 44–56 in.; check the current label and size chart for the exact product variant.
The practical advantage is the cut and ventilation, not a promise that one vest will fit everyone. A size range overlaps at the boundaries, so try it on with your paddling clothes and perform the lift check before heading out. The vest includes a whistle, which may mean you do not need to buy a second one; inspect the included whistle and make sure it is attached and reachable.
- Best for: recreational paddlers who want a foam PFD with a kayak-friendly back panel and adjustable fit.
- Think twice if: the available size does not pass the lift test, the back panel conflicts with your seat, or you need a different approved performance category.
- Before checkout: confirm the exact model, size, approval label, included whistle and current seller listing.
How to choose the right kayak paddle
A kayak paddle has two blades, one at each end. The correct length depends mainly on your height and the width and shape of the kayak. A wide recreational boat usually needs a longer paddle than a narrow touring kayak because the blade must reach the water outside the hull. A tall paddler may also need more length. Do not buy a paddle because a friend uses that size or because a retailer labels it “standard.”
Measure the kayak before choosing the length
Find the boat's widest point in the manufacturer's specifications. Then use the paddle maker's sizing chart, which combines boat width and paddler height. Your stroke style and seat height can move the recommendation slightly: a relaxed, low-angle stroke and a high seat may call for a longer paddle, while a more vertical, high-angle stroke may call for a shorter one. If you are between sizes, ask the outfitter to let you try both lengths in the actual kayak.
A paddle that is too short can make your knuckles hit the gunwale or force you to lean to reach the water. One that is too long adds swing weight and can make the stroke feel awkward. Correct length is more important than upgrading to a carbon shaft. A well-sized, affordable paddle is a better first choice than an expensive paddle that does not fit the boat.
Aluminum, fiberglass or carbon?
- Aluminum shaft: usually the budget-friendly, durable starting point. It can feel cold in cool weather and is often heavier than fiberglass or carbon.
- Fiberglass shaft: generally lighter and warmer to hold than aluminum, with a higher price. It is a practical middle ground for frequent recreational paddling.
- Carbon shaft: usually the lightest option and can reduce fatigue over long days, but costs more and is not essential for a first short trip.
- Blade material: plastic or polypropylene blades are affordable and forgiving for casual use; reinforced or composite blades can be stiffer and lighter, but may cost more and deserve more care around rocks.
For a beginner paddling a lake for an hour, paddle weight may matter less than fit and comfort. If you start paddling often, the repeated lift of a heavy paddle can become noticeable. That is when a fiberglass or carbon shaft may be worth considering.
Blade shape and feathering
Most recreational paddles have asymmetrical blades designed to move water efficiently. A dihedral ridge can help the blade track more predictably and reduce flutter. The two blades may sit in the same plane or be angled relative to each other; that angle is called feathering. A feathered blade can present less surface to the wind while it is raised, but it requires you to rotate the shaft correctly with your control hand.
Start with the blades unfeathered (0 degrees) if your paddle allows it. That keeps the hand movement simpler while you learn to balance, steer and coordinate the stroke. You can experiment with a feather angle later if it makes sense for your conditions and technique. There is no rule that every recreational paddler must feather a paddle.
2. Bending Branches Whisper: a straightforward recreational paddle
Two-piece paddle · Aluminum shaft · Polypropylene blades · 210, 220, 230 or 240 cm
The Whisper is an entry-level recreational paddle with a two-piece aluminum shaft, polypropylene blades and a three-position snap-button ferrule that allows 0-degree or 60-degree feathering for left- or right-hand control. Bending Branches lists a 6.75 × 18 in. blade, 89 sq. in. surface area and a weight of 37 oz. The manufacturer describes it as a lake and casual-river paddle and lists a two-year manufacturing warranty.
Its appeal is uncomplicated construction and a choice of common lengths. The trade-off is weight: at 37 oz., it is not a lightweight touring paddle, and aluminum can feel cold in cool conditions. That is a reasonable compromise for occasional recreational use, provided you choose the correct length. The 210–240 cm options are not interchangeable; use the maker's sizing chart with your boat width and height.
- Best for: new paddlers who want a durable two-piece paddle for short recreational trips.
- Think twice if: you paddle long distances often and want to reduce swing weight, or you need a length outside the available range.
- Before checkout: measure the kayak, confirm the length and check that the ferrule locks securely in the chosen position.
See the Bending Branches Whisper specifications and the manufacturer's kayak paddle sizing guide.
What to wear kayaking
Choose clothing for the water you could end up in, not only the weather you expect to enjoy. A capsize can happen on a sunny day, and water removes body heat much faster than air. The phrase “dress for the water temperature” is a practical reminder to think about immersion, not just comfort while sitting on shore.
Warm water and warm weather
For a short trip in genuinely warm water, wear a swimsuit or quick-drying shorts with a rash guard or moisture-wicking shirt. Add a sun hat, sunglasses with a retainer, water-resistant sunscreen and secure footwear. Neoprene shoes or sandals designed to stay on your feet are better than loose flip-flops, which can float away or make a slippery launch harder.
A lightweight rain shell or paddling jacket can help when spray or a passing shower is expected, but it is not thermal protection for cold water. Keep a dry insulating layer in a dry bag or at the vehicle for after the trip. Avoid cotton as your main paddling layer: when wet, it can stay cold and heavy.
Cold water needs a different plan
Air temperature can be misleading. If the water is cold enough to make an unexpected swim dangerous, ordinary shorts and a T-shirt are not an adequate plan. REI's beginner guidance uses water at or below 60°F as a point where a wetsuit or suitable dry protection is needed. Treat that as a serious warning threshold, not a universal guarantee: wind, exposure time, remoteness, your ability to swim and the chance of rescue all matter. Colder water and longer or more exposed routes may require a properly fitted drysuit or other specialist protection.
A wetsuit works by trapping a thin layer of water that your body warms; a drysuit is designed to keep water out and is normally worn with insulating layers underneath. Neither works well if it is the wrong size or used outside its intended conditions. Learn how to choose and use cold-water protection before you launch. If you do not own suitable equipment or know how to use it, choose a warmer day or a guided trip with the right gear.
Footwear, hands and sun exposure
Choose footwear that stays on your feet, protects against sharp stones and gives traction on a wet launch. Neoprene booties are useful in cooler conditions; secure water shoes or sandals can work in warm weather. Paddling gloves or pogies may help with cold hands on longer trips, but they should not interfere with grip or your ability to release the paddle. A brimmed hat, sunglasses retainer and sunscreen are small items that are easy to forget and hard to replace once you are away from shore.
Dry storage, signaling, water and small safety items
For a short day paddle, you do not need a large expedition pack. You do need a reliable way to keep a few important items protected and accessible. Separate items by how quickly you may need them: the whistle belongs on the PFD, the phone should be protected but reachable, and spare clothing can sit deeper in the dry bag.
Use a dry bag correctly
A 5–10 L dry bag is often enough for a phone pouch, keys, small first-aid kit, snacks and a light spare layer on a short outing. A larger bag may be useful for a change of clothes or a towel, but a bigger bag is not automatically safer. Keep the load compact so it does not slide around the deck or interfere with your movement.
Roll-top bags only work when closed as intended. Put items inside, flatten the opening, roll the top down several times according to the maker's instructions, then clip the ends together. Some floating dry bags rely on a little trapped air for buoyancy. Do not assume that a bag marketed as waterproof is designed for prolonged submersion. Earth Pak, for example, describes its Original dry bag as IPX5 and says it should not be submerged for more than a few seconds. Put a phone in a separate waterproof phone case as a second layer of protection.
3. Earth Pak Original Dry Bag: simple storage for a short paddle
5 L, 10 L and 20 L sizes · 500D PVC · Roll-top closure · Five-year manufacturer warranty
The Original Dry Bag is a basic roll-top design made from 500D PVC. Earth Pak offers it in 5 L, 10 L and 20 L sizes with a shoulder strap and attachment points. For a short day paddle, the 10 L size is a useful middle option for small personal items and a light spare layer; the 5 L size may be enough if you pack minimally, while 20 L is easier to overfill and can take up more deck space.
The important limitation is the waterproof rating. Earth Pak lists IPX5 protection for the bag and explains that it is intended to float, not remain underwater. The 10 L Amazon bundle linked here is listed with a separate waterproof phone case for phones up to 6.5 in.; that pouch is a second layer, not a reason to submerge the bag. In a hands-on review, Pack Hacker found that the bag handled heavy splashes and light rain, but the roll-top could let a little water in if submerged, and the phone-case closure took some practice. Roll the top down three or four times, leave some air inside to help it float, and test both closures at home before trusting them on the water.
- Best for: keeping a spare layer, snacks and non-fragile essentials together on a recreational outing.
- Think twice if: you need prolonged submersion protection or plan to carry expensive electronics without a second waterproof layer.
- Before checkout: choose a size that fits the boat's storage area and check the exact closure, strap and warranty terms.
See Earth Pak Original Dry Bag sizes, materials and care instructions.
Carry a whistle where you can reach it
A whistle is a simple way to make a sound signal without relying on a phone or shouting. Attach it to the PFD in a place you can reach with either hand. Do not leave it inside the dry bag. Federal navigation rules say vessels under 12 meters do not have to carry the prescribed whistle appliance, but they must have some other means of making an efficient sound signal. State, park and waterway rules may add requirements, so check the rules where you launch.
Three long blasts are widely used as a distress signal in paddling guidance. Learn the local signaling procedure and keep the whistle accessible. If your PFD includes one, inspect it and make sure it is attached. A separate whistle can be a useful replacement or backup, but buying another one is unnecessary if the included whistle is reliable and easy to reach.
4. Fox 40 Classic: a compact pealess whistle
Three-chamber pealess design · Manufacturer-rated 115 dB · Attachment options vary by version
The Fox 40 Classic uses a three-chamber pealess design with no moving parts. Fox 40 lists a manufacturer-rated sound power of 115 dB and describes the chambers as self-clearing when submerged. It is a small, straightforward whistle to compare if your PFD does not include one or if the supplied whistle is difficult to use.
The basic version may be sold without a lanyard, so check the exact package and attachment option. Use a suitable attachment that keeps the whistle fixed to the PFD without creating a snag hazard. A loud whistle does not guarantee that someone will hear it across a large lake, and it does not replace a float plan, a buddy or a phone/radio when those are appropriate.
- Best for: a simple replacement or backup sound signal that can be kept on the PFD.
- Think twice if: your current PFD already has a reliable, accessible whistle and you do not need a spare.
- Before checkout: confirm the exact Classic or Classic CMG version and whether a lanyard is included.
Phone, water and first aid
Carry a charged phone in a waterproof case and keep it somewhere you can reach without unpacking. A phone in a dry bag at the bottom of a hatch is protected but not useful for a quick call. Do not assume you will have cell service everywhere. For remote routes, longer trips or areas with poor coverage, ask local paddlers or the land manager what communication device is appropriate; a marine VHF radio, satellite messenger or other device may require training and route-specific planning.
Bring enough drinking water for the planned time, temperature and exertion, plus a little extra. Secure the bottle so it cannot roll away. A small first-aid kit should cover minor cuts, blisters and personal needs; add prescription medication and any items you specifically require. Keep everything protected from spray and know how to reach it while seated.
Extra equipment for sit-inside kayaks
A sit-inside kayak needs a little more thought because water can enter the cockpit and stay there. A bilge pump removes water from the boat; a sponge helps clear the last amount around the footwell. A spray skirt can keep water out in the right conditions, but it also closes the cockpit and must be released correctly if you capsize. A paddle float is used in certain self-rescue techniques, but it only helps when you know the technique and have practiced it.
5. NRS Kayak Bilge Pump: for boats that can collect cockpit water
21 in. long · Full-length foam float · Manufacturer-listed 8 gallons per minute
The NRS Kayak Bilge Pump is a manual pump intended to remove unwanted water from an open boat. NRS lists a 21 in. length, a full-length foam float, stainless-steel screws and a pumping rate of up to 8 gallons per minute. It does not need a separate hose; water sprays over the side of the kayak or canoe.
This is most relevant to sit-inside kayaks and trips where cockpit water needs to be removed. It is not a must-buy for every beginner in a sit-on-top rental, and it does not make a swamped boat safe by itself. Learn how to keep the pump secured but reachable, how to use it without losing balance, and what to do after a capsize. A pump is one part of a system that also includes a suitable boat, PFD, practiced wet exit and rescue skills.
- Best for: paddlers using a sit-inside kayak who need a simple manual way to remove water.
- Think twice if: you are renting a sit-on-top for a short calm-water trip and the outfitter's equipment already covers the situation.
- Before checkout: confirm the pump length fits your cockpit and that it can be secured without blocking your exit.
Do not buy a spray skirt before learning a wet exit
A spray skirt is designed to seal around the cockpit rim and the paddler's waist. It can keep waves and spray out, but a beginner must know how to find and pull the release loop, exit the cockpit and separate from the boat. Practice with an instructor in controlled, shallow conditions before using a skirt on open water. Never attach a skirt in a way that blocks the release loop.
Rescue equipment is only useful when you know how to use it
A paddle float, towline, rescue knife, throw bag, VHF radio and other specialist equipment may be appropriate for longer, colder, remote or more exposed trips. They are not a universal beginner shopping list. Some items can create additional hazards if attached incorrectly or used without training. Ask a qualified instructor or local paddling organization what is appropriate for your boat and waterway, then practice with the equipment before depending on it.
Plan and prepare for your first outing
Good planning reduces the number of surprises you have to manage from the kayak. A first trip should be short, close to a safe landing and on water where you can easily identify hazards. A route that looks small on a map can feel much longer when you are learning to paddle, steering in a breeze or returning against a headwind.
Choose the water before you choose the route
Start with a small lake or pond with little or no powerboat traffic, a gentle launch and sheltered shoreline. Check local access rules, launch fees, closures, no-wake areas, swimming zones and any seasonal restrictions. Avoid unfamiliar rivers with current, dams, spillways, strainers or low-head dams. Do not treat a calm-looking river bend as a beginner route unless a local expert has confirmed the conditions and hazards.
Do not make your first trip an offshore, open-coast or sea-cave outing. The National Park Service warns that sea kayaking in exposed park waters can involve quickly changing weather, waves and hazards, and says novices should not attempt challenging sea routes on their own. A guided trip is the appropriate entry point for those environments.
Check wind, storms, water temperature and visibility
Check the forecast close to departure and again before launching. Look beyond the chance of rain: wind direction, gusts, thunderstorms, temperature changes, visibility and the forecast for the time you expect to return all matter. A tailwind can push a beginner farther from the launch than planned, then become a difficult headwind on the way back. If the breeze is noticeable or conditions are changing, ask a local outfitter or experienced paddler whether the route is appropriate. If you are unsure, postpone.
For coastal or tidal water, check tide tables, current predictions, surf and marine forecasts. For lakes, check local wind forecasts, water levels and park advisories. Never launch during a thunderstorm or when lightning is in the area. Do not rely on a phone weather app alone if local conditions are known to change quickly.
Use a buddy system and leave a float plan
For your first outings, go with a competent paddling partner or a qualified guide. Stay close enough to see and communicate with one another; a buddy who disappears around a bend cannot help quickly. Paddle at the pace of the least experienced person and agree on where the group will turn around.
Before leaving, tell a trusted person where you are launching, your planned route, who is going, what time you expect to return and when they should raise the alarm if they do not hear from you. This is a float plan. Update the person if the plan changes. Do not assume that sharing a map pin once is the same as leaving a useful plan.
Keep the first trip short and easy to end
Choose a loop or out-and-back route with several safe places to land. Keep the distance modest and set a turnaround time before you start. For a first non-guided outing, REI suggests keeping paddling time under two hours; treat that as a conservative planning reference, not a target you must reach. It is usually better to finish while everyone still has energy than to paddle until shoulders, hands or attention are tired. If the wind picks up, a person feels unwell, the group spreads out or the return looks harder than expected, shorten the route or land safely.
For a manageable breeze, some instructors recommend starting into the wind so the return leg is not a struggle against a headwind. That advice only applies when the conditions are already suitable for your skill level. It is not a reason to launch into strong wind, offshore wind or whitecaps.
Basic skills to practice before leaving shore
Take a few minutes on land to set the kayak up and understand the paddle. Then practice in shallow, protected water where you can stand or return to shore easily. If you are unsure how to exit the boat, turn it, or respond to a capsize, learn those skills with a qualified instructor before paddling farther from shore.
Adjust the seat and footrests
Sit upright with your back supported and your weight centered. On a sit-inside kayak, place the balls of your feet on the footrests and keep a slight bend in your knees. Your knees should make comfortable contact with the sides of the cockpit without being trapped; you must be able to exit if the kayak capsizes. On a sit-on-top, adjust the footrests and seat so you can maintain a stable, relaxed posture. Make adjustments while the boat is on land whenever possible.
Hold the paddle without squeezing it
Center the shaft above your head and start with your hands roughly shoulder-width apart; the exact position depends on the blade design and your arm span. Keep your wrists neutral and your grip relaxed. Check that the longer edge of an asymmetrical blade is oriented correctly and that the blades are set to the feather angle you intend to use. If you are learning, 0 degrees is a simple starting point.
Learn three basic strokes
- Forward stroke: place the blade in the water near your feet, rotate your torso as you draw it back alongside the kayak, and lift it out around your hip. Use torso rotation rather than pulling only with your arms.
- Reverse stroke: place the blade near your hip and push it toward your feet to slow or move backward. Practice stopping before you need to do it near another boat or the shore.
- Sweep stroke: make a wide arc with the blade to turn the kayak. A forward sweep on the right turns the bow left; a forward sweep on the left turns it right.
Practice stopping, turning both directions and keeping the boat pointed where you want it to go. These basics are more useful to a beginner than trying to paddle fast. Do not drink alcohol before or during a paddle; it can impair judgment, coordination and your ability to respond to changing conditions. If the boat has a rudder or skeg, ask the outfitter to explain it and follow the manufacturer's instructions; do not deploy or adjust unfamiliar hardware in shallow water where it could strike the bottom.
Know what to do if you capsize
A capsize is not the time to discover that your PFD is loose, your phone is unreachable or you do not know how to exit the cockpit. Before the trip, learn the correct wet-exit and self-rescue procedure for the exact kayak. Practice in controlled conditions with an instructor or experienced paddler, not alone in deep water. Keep your PFD on, signal for help when needed and follow the rescue plan you have practiced. Do not assume that a dry bag, bilge pump or paddle float makes an unpracticed rescue safe.
For a first outing, the simplest way to reduce risk is to choose water where you can land easily, remain with a buddy and avoid conditions that would make a capsize difficult to manage. If you are not trained to re-enter a kayak in open water, do not plan a route that depends on doing so.
First kayaking trip checklist
This compact list is designed for a short recreational outing on sheltered water. It is not a substitute for the local rules, the outfitter's instructions or a route-specific safety plan.
- Check the forecast for wind, gusts, storms, visibility and temperature changes.
- Check water temperature, local hazards, access rules and launch conditions.
- Tell someone your route, group, launch point and expected return time.
- Confirm the kayak's capacity and condition; inspect the paddle and PFD.
- Pack water, snack, sun protection, first aid, medication, phone and a dry layer.
At the launch
- Put on the PFD and adjust it until it passes the lift test.
- Attach the whistle where you can reach it immediately.
- Check the kayak's drain plugs, hatches, seat, footrests and any required pump.
- Confirm that nobody has consumed alcohol before launch and agree that no one will drink while paddling.
- Confirm that the paddle is the right length and its ferrule is locked.
- Secure the dry bag and phone; do not leave loose items where they can fall overboard.
- Agree on the route, turnaround time, hand signals and what the group will do if separated.
- Practice a forward stroke, reverse stroke and sweep in shallow protected water.
On the water
- Stay within the planned route and keep your buddy in sight and earshot.
- Keep clear of motorboat channels, swimmers, fishing lines and other craft.
- Watch wind direction, cloud build-up, waves, boat traffic and how quickly you are tiring.
- Keep the group visible to other boaters; bright clothing and a visible PFD help a low-profile kayak stand out.
- Drink regularly, protect yourself from sun and take breaks before you are exhausted.
- Turn back early if conditions change or the return becomes uncertain.
- Do not remove your PFD while afloat.
After landing
- Land in a suitable area and keep clear of other launch users.
- Check the group is complete before carrying or loading boats.
- Drain and rinse the kayak and paddle as the manufacturer recommends.
- Dry the PFD and inspect straps, buckles, seams and flotation material.
- Update the person holding your float plan that you have returned safely.
Beginner kayaking mistakes worth avoiding
1. Choosing a route because it looks short on a map
Wind, current, boat wakes and fatigue can turn a short distance into a demanding return. Choose a route with easy landing options and a clear turnaround point. Build distance only after you have learned how the boat handles and how long you can paddle comfortably.
2. Wearing a PFD that is available rather than one that fits
A loose or damaged vest can ride up or interfere with movement. Check the approval label, size, condition and fit every time. If it fails the lift test, try another size or model.
3. Dressing for the beach instead of the water
Shorts and a T-shirt may feel right on shore but can be inadequate after a capsize in cold water. Check water temperature and wear protection suited to immersion.
4. Buying accessories before learning the basics
A paddle float, spray skirt, towline or rescue knife may be useful in a specific system, but each has a purpose and technique. Start with the essentials, learn the boat and take a class before buying specialist equipment.
5. Assuming a dry bag is a waterproof phone case
Roll-top bags have limits and must be closed correctly. A floating bag is not necessarily submersible. Protect a phone in its own waterproof case and keep it accessible.
6. Paddling alone on the first trip
A buddy can help summon assistance, keep the group together and provide support if a problem develops. Stay within sight and earshot; do not treat a group as safe if everyone paddles off separately.
7. Ignoring the return journey
It is easy to enjoy a tailwind on the way out and discover that the return is much harder. Watch the wind, preserve energy and turn around before the conditions or your strength change.
For a vehicle-supported lake weekend, our car-camping essentials checklist covers the dry clothes, food, lighting and vehicle supplies that make a lakeside trip easier. If you are planning an overnight paddle with a portage or backcountry camp, use the beginner backpacking gear checklist to plan shelter and sleep, and compare water-treatment options in our backpacking water filter guide. A filter is only appropriate when its capabilities match the likely contaminants; do not assume that every filter makes every water source safe. Birdwatchers who want to learn the species they may see around lakes and shorelines can also use our birdwatching for beginners guide for identification basics and bird-friendly observation tips.
Kayaking for beginners FAQs
What do I need for my first time kayaking?
Start with a suitable kayak, a correctly sized paddle, a properly fitted U.S. Coast Guard-approved wearable PFD, an accessible whistle or other sound signal, water, sun protection, suitable footwear, a phone in waterproof protection and a small first-aid kit. Add clothing for the water temperature and a dry bag for essentials. If you use a sit-inside kayak, ask what cockpit-water equipment and rescue skills are needed.
Is kayaking hard for beginners?
Basic recreational paddling can be learned by many beginners on calm, sheltered water with a suitable boat and instruction. Balance, steering, wind, boat traffic and capsize response still require practice. Start with a short guided or supervised outing rather than assuming that a stable-looking lake is risk-free.
Should a beginner use a sit-on-top or sit-inside kayak?
A sit-on-top is easy to enter and exit and lets water drain through scupper holes, but you should expect to get wet. A sit-inside offers more protection from spray and wind but requires you to understand a wet exit and how to remove cockpit water. For a first warm-weather lake outing, many beginners find a stable sit-on-top easier; the best choice depends on the water, weather, fit and instruction available.
Do I have to wear a life jacket while kayaking?
Federal rules require a wearable PFD for each person aboard a recreational vessel, and the device must be used according to its approval label and any referenced manual. State, park and local rules may require wearing it. Federal rules require children under 13 to wear an appropriate Coast Guard-approved PFD while underway, subject to limited exceptions. Regardless of local carriage rules, wear a properly fitted PFD while kayaking because it only helps if it is on you when you enter the water.
What kind of life jacket is best for kayaking?
Choose a U.S. Coast Guard-approved PFD labeled for the intended activity, in the correct size and weight range. A foam paddling vest with large arm openings and a back panel that works with your kayak seat is a practical option for many recreational paddlers. Check the approval label and fit; do not assume all Type or Level categories provide the same in-water performance.
What size kayak paddle do I need?
Paddle length depends mainly on your height and the kayak's width, with adjustments for seat height and stroke style. A wide recreational kayak usually needs a longer paddle than a narrow touring boat. Measure the boat and use the paddle manufacturer's sizing chart, then try the recommended length if possible. Do not rely on a universal 220 cm or 230 cm rule.
What should I wear kayaking in summer?
For genuinely warm water, wear quick-drying, non-cotton clothing such as swimwear and a rash guard, secure water shoes or sandals, a sun hat and sunglasses with a retainer. Bring water-resistant sunscreen and a dry layer for after the trip. If the water is cold, summer air temperature does not remove the need for thermal protection.
Is a dry bag enough to protect my phone?
Not necessarily. Roll-top dry bags must be closed correctly and many are designed to float rather than remain submerged. Use a separate waterproof phone case as a second layer, test it before the trip and keep the phone accessible. Never assume an IP rating or the word “waterproof” means the item can be left underwater indefinitely.
Do I need a bilge pump for a recreational kayak?
A bilge pump is most relevant to sit-inside kayaks that can collect water in the cockpit. It is not usually a universal purchase for a short sit-on-top rental, where water drains through scupper holes. Follow the boat maker's guidance and learn how to use the pump without compromising your balance or exit. A pump does not replace a PFD, wet-exit practice or rescue training.
Can I kayak alone as a beginner?
It is safer to go with a competent buddy or a qualified guide, especially while you are learning. Stay close enough to see and communicate with the other paddler, agree on a route and turnaround time, and leave a float plan with someone on shore. Do not paddle alone on unfamiliar, exposed or moving water without the training and equipment appropriate to that environment.
What water temperature is too cold for kayaking?
There is no single temperature that makes every trip safe or unsafe. REI's beginner guidance treats water at or below 60°F as a point where a wetsuit or dry protection is needed. Colder water, wind, trip length, remoteness and your ability to manage immersion can require more protection. If you do not have suitable clothing and training, postpone the trip or go with a qualified outfitter.
How long should a beginner kayak trip be?
Keep the first outing short enough that you can return while you are still comfortable and conditions are stable. A simple route near a safe landing is more useful than a distance goal. Set a turnaround time before launch and shorten the trip if the wind, group energy or weather changes.