
Birdwatching for beginners can start with nothing more than a quiet place to sit, a little patience and a way to note what you see. Binoculars make distant details easier to study, while a bird ID app or regional field guide helps turn a quick glimpse into a useful identification. At home, the most dependable way to welcome more birds is to offer a healthy habitat: native plants, clean water, safe shelter and—if you can maintain it—a well-placed feeder. This guide explains what beginners actually need, how to identify birds without guessing from color alone, and how to create a bird-friendly backyard without buying a yard full of equipment.
Affiliate disclosure: This article contains affiliate links. TestedWise may earn a commission if you purchase through them, at no additional cost to you. Read the full disclosure.
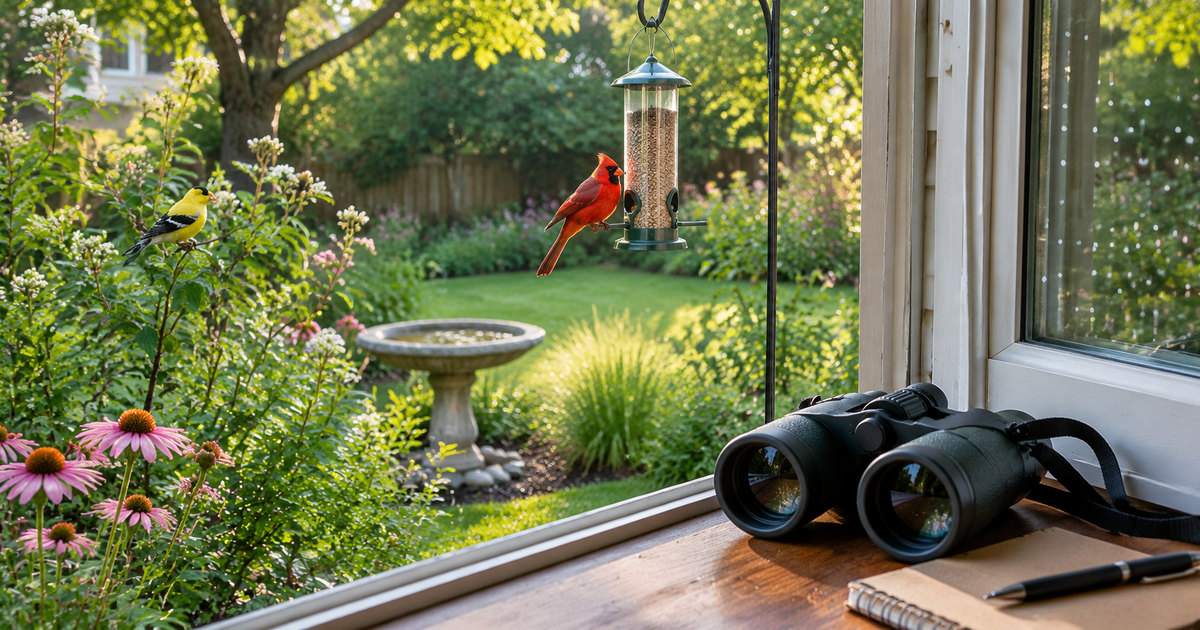
This guide is written for new birdwatchers in the United States and Canada, including people who want to watch birds from a window, balcony or small yard as well as those planning easy visits to parks and nature trails. Species, seasons, feeder rules and disease advisories vary by location, so use local bird lists and wildlife guidance rather than expecting one national shopping list to fit every yard.
1. Start birdwatching with what you already have
The easiest first birding session is usually the one that does not require a trip to a store. Pick a place where birds already move through: a kitchen window, a balcony, a quiet corner of a park, a pond edge or a tree-lined sidewalk. Spend ten or fifteen minutes looking before you try to name anything. Notice which birds stay on the ground, which cling to trunks, which visit flowers and which arrive in quick groups.
That first session gives you two useful things: a sense of what is actually present and a reason to decide whether you need more equipment. If most of the birds are close, binoculars may not be urgent. If they stay high in trees or across a pond, a modest pair can make the hobby much more rewarding. If you enjoy figuring out unfamiliar calls, a bird ID app may be more useful at first than a printed guide.
Keep a small note of the date, time, location and what you noticed. “Small gray bird, thin bill, repeatedly flicked its tail from a low branch” is a better starting record than “maybe a sparrow.” A useful observation does not have to be a perfect species identification. It gives you something concrete to check later.
Choose a first goal that is easy to reach
Do not begin by trying to identify every bird in North America. Pick five birds that are common where you live and learn to recognize them in more than one way. In many neighborhoods, that might include a robin, a cardinal, a house finch, a chickadee or a mourning dove—but the right list depends on your region. A coastal yard, desert neighborhood, northern forest edge and city courtyard will not have the same regular visitors.
Use a local checklist from eBird or the location tools in Merlin Bird ID to see which species are plausible near you. Start with birds that are common and easy to observe. Familiarity with a few regular visitors makes it easier to notice a new one.
2. The essential birdwatching gear checklist
For ordinary backyard birdwatching and easy daytime outings, the list is short. Spend money on the things that improve observation or protect birds; skip accessories that solve problems you do not have yet.
| Item | Essential? | What it does | Beginner advice |
|---|---|---|---|
| Binoculars | Useful, not mandatory | Brings distant birds and field marks into view. | Try 8x42 or 8x32 before buying. Comfort matters as much as magnification. |
| Bird ID app | Strongly useful | Suggests likely species from location, photos or sound. | Use it to narrow choices, then confirm with visible clues and range. |
| Regional field guide | Optional | Provides illustrations, range maps and comparison details. | Choose a guide for your region, not a huge global encyclopedia. |
| Notebook or phone notes | Useful | Records size, shape, behavior, habitat, date and location. | Write observations before searching for a name. |
| Weather-appropriate clothing | Essential outdoors | Keeps you comfortable while standing or sitting still. | Dress for wind, shade and changing conditions, not just the forecast high. |
| Water and a small day bag | For outings | Supports a longer walk and keeps essentials together. | Use the same light day-hike basics you would bring on another easy trail. |
| Feeder, seed and bird bath | Optional at home | Can bring some species closer to a viewing spot. | Start with one feeder or a shallow dish. Maintenance is part of the setup. |
| Camera or spotting scope | Not needed at first | Captures distant details or images. | Wait until you know what you enjoy photographing or observing. |
A useful rule is to buy for the birds you are already seeing. If you do not have a safe place to hang a feeder, do not buy one just because a beginner checklist includes it. If you mostly watch birds at a nearby wetland, a feeder and a bag of seed may add nothing to the experience. A pair of binoculars and a local species list could be the better investment.
3. How to choose beginner birdwatching binoculars
Binoculars are the first substantial purchase many birdwatchers make. The numbers on the body can look cryptic, but the most common beginner sizes are easy to understand. In a label such as 8x42, the first number is magnification: the bird appears about eight times closer than it does to the unaided eye. The second number is the diameter of each front lens in millimeters. Larger objective lenses can gather more light, but they usually make the binoculars bigger and heavier.
8x42, 8x32 or 10x42?
| Size | Strength | Trade-off | Best fit |
|---|---|---|---|
| 8x42 | Wide, relatively steady view and a bright image in changing light. | Bulkier than compact models; often around 20 oz or more. | A versatile first pair for backyard and general birding. |
| 8x32 | Lighter and easier to carry on walks. | Smaller exit pupil can feel less forgiving in dim light or when positioning your eyes. | People who value compact size and mostly bird in daylight. |
| 10x42 | More magnification for birds across open water or fields. | Narrower view and more visible hand shake can make a moving bird harder to find. | Experienced users who prefer extra reach and can hold the view steady. |
For a first full-size pair, 8x42 is a sensible default rather than a rule. The wider field makes it easier to locate a bird among branches, and lower magnification is generally easier to hold steady. Cornell Lab's review of affordable full-size binoculars describes 8x42 as a popular, versatile birdwatching format. If you mostly watch birds from a small balcony or carry gear on long walks, an 8x32 may be more comfortable.
What matters more than a long feature list
- Comfort and fit: Hold the binoculars to your eyes for a few minutes. The barrels should adjust to your eye spacing, and you should see one full, round image rather than two overlapping circles.
- Eye relief: If you wear glasses, look for enough eye relief to see the full field without pressing the eyecups into your lenses. Twist-up or adjustable eyecups help.
- Focus control: The center focus wheel should be easy to reach and smooth enough to make small adjustments. Try it with the gloves you expect to wear.
- Close focus: A shorter minimum focus distance can help with nearby birds, butterflies and other wildlife. It is useful, but not the first specification to chase.
- Weather protection: Waterproof and fog-resistant construction is useful outdoors. It does not mean the binoculars are designed for underwater use.
- Weight: A model that stays at home because it feels heavy is less useful than a lighter pair you actually carry.
1. Nikon PROSTAFF P3 8x42: a practical full-size first pair
8x magnification · 42 mm objective lenses · 377 ft field of view at 1,000 yd · 20.3 oz · 9.8 ft close focus
The PROSTAFF P3 8x42 is a straightforward example of the full-size format many new birdwatchers are considering. Nikon lists a 377-foot field of view at 1,000 yards, 20.2 mm of eye relief, a 9.8-foot close-focus distance and a weight of about 20.3 ounces. The maker describes the model as waterproof and fogproof, with rubber armoring and adjustable eyecups; its published waterproof limit is up to 1 meter for 10 minutes, not underwater use. Those details make it a reasonable general-purpose option for a backyard, local park or nature trail.
The trade-off is size. At a little over 20 ounces, it is not a pocket binocular, and an 8x42 may feel large if you mainly want something to keep in a jacket pocket. Try the eyecup position and focus wheel before committing, especially if you wear glasses. Nikon's waterproof rating is for accidental exposure within its stated limits, not for submerging the binoculars.
How to use binoculars without losing the bird
- Find the bird with your unaided eyes. Keep looking at it rather than staring down at the binoculars.
- Raise the binoculars to your eyes while keeping your gaze fixed on the bird.
- Turn the center focus wheel until the bird's outline and markings sharpen.
- If the image looks doubled or dark around the edges, adjust the barrels and eyecups until the view is comfortable.
- Lower the binoculars occasionally and check the bird's behavior and surroundings. The context often helps with identification.
Practice on a stationary object before trying to follow a moving bird. A tree trunk, fence post or feeder is a useful target. Learn where the focus wheel sits by touch so you do not have to take your eyes away from the subject.
4. How to identify a bird: four clues to notice
Color is memorable, but it is not always the best place to start. Light, distance, shadow, age, sex and seasonal plumage can change how a bird looks. Experienced birders narrow down an identification by combining several clues. The four basic keys used in Cornell Lab and Audubon learning resources are size and shape, color pattern, behavior, and habitat.
1. Size and shape
Start with an estimate: smaller than a sparrow, about robin-sized, or closer to a crow? Then look at the silhouette. Is the body round or slender? Is the neck long? Are the legs short or obvious? Is the bill thick and cone-shaped, narrow and pointed, hooked or long and probing? A chunky bird with a short, strong bill suggests a different group from a slim bird with a fine insect-catching bill.
Compare the bird with something familiar if you can. Size is difficult to judge at a distance, but a bird beside a robin, pigeon or feeder port gives you a useful reference.
2. Color pattern and field marks
Once you have a general shape, look for repeatable markings: a stripe above the eye, a dark throat patch, wing bars, spots on the breast, a pale eye ring, a contrasting rump or a particular tail pattern. These details are more dependable than a vague impression such as “yellow bird” or “brown bird.” Look at where the color appears, not just which color it is.
3. Behavior
Watch what the bird does. Does it hop along the ground, climb head-first down a trunk, hover at flowers, probe mud, flick its tail, or make repeated short flights from the same perch? Behavior can separate birds that look similar in a quick view. Notice whether it feeds alone or in a flock, how it moves between branches and whether it uses the ground, water or canopy.
4. Habitat, location and season
A bird seen at a marsh is more likely to be a wader or waterbird than a species tied to dry pine woods. A winter visitor in the northern United States may be absent in summer. Range maps and seasonal occurrence help narrow the possibilities, but they are not absolute boundaries: migration, weather and unusual vagrants can produce surprises.
Make a short description before opening an app: “small, olive-brown bird, thin bill, moving through low shrubs, two pale wing bars.” Then compare the likely species. That habit builds identification skills much faster than accepting the first colorful picture that appears on a screen.
5. Use Merlin, eBird and field guides wisely
Digital tools have made bird identification more accessible, but they work best as assistants rather than automatic authorities. A location-aware app can suggest species that are likely nearby, identify a bird from a photo or analyze a recording. Your own observation still matters: check whether the suggested bird matches the size, shape, field marks, habitat and season.
Merlin Bird ID: a useful first app
Merlin Bird ID is a free app from the Cornell Lab of Ornithology. It can help identify birds through a short question flow, a photo, a sound recording or a regional bird list. Download the bird packs for the places you expect to visit before heading somewhere with poor mobile reception. The app's suggestions are not a substitute for checking the bird itself: background calls, overlapping songs, poor light and an incorrect location can lead to a misleading result.
Use Sound ID as a way to notice that something is calling nearby, then listen for the source and try to see the bird. Do not play calls repeatedly to bring a bird closer. Playback can disturb birds, particularly during nesting or when a species is rare or vulnerable in the area.
eBird: learn what is likely and keep a record
eBird is useful for checking recent sightings, exploring birding locations and keeping a list of birds you have observed. Look at the date of a report and the habitat where the bird was seen. A sighting from last spring is not proof that the species is present today. For your own checklists, record only birds you can identify with reasonable confidence; a careful “unknown sparrow” note is better than an inaccurate species report.
When a printed field guide is worth having
A regional book can be easier to compare than a phone screen, especially when two species look alike. Look for clear illustrations or photographs, range maps, seasonal plumage and notes on similar species. A guide specific to eastern or western North America can be more useful than a very broad guide if you mainly bird close to home.
2. National Geographic Backyard Guide to the Birds of North America: a home-focused print reference
Jonathan K. Alderfer and Paul Hess · Paperback · 150 common North American backyard species · 2011 edition
This guide is aimed at the birds many people are likely to see around feeders, neighborhoods and nearby nesting areas. Its 150-species selection, visual index, range maps and short identification notes make it a manageable reference for a beginner who wants to learn familiar backyard birds rather than carry a comprehensive field guide. It also includes introductory backyard habitat and feeding information.
The limitation is its publication date. It is a 2011 book, so use it as a visual learning aid rather than the final word on current taxonomy, range changes or recent sightings. Pair it with Merlin or eBird when you need up-to-date local information, and check that the listing is for the paperback edition you intend to buy.
6. Build a bird-friendly backyard in layers
A bird-friendly yard is not the same thing as a yard with the most feeders. Birds need food, water, shelter and safe places to rest or nest. A feeder can bring a few species close to a window, but native plants and a mix of vegetation support a broader range of birds and the insects many species depend on. If you only make one long-term change, improving the habitat is usually a better investment than adding another feeder.
Layer 1: native plants for natural food
Choose plants that belong in your local ecoregion. Native trees and shrubs can provide caterpillars, berries, seeds, nectar, nesting material and cover at different times of year. A white oak in the eastern United States, serviceberry in suitable regions, native grasses, coneflowers and local berry-producing shrubs can support very different food webs depending on where they are planted. Do not copy a plant list from another state without checking whether those species are native and suitable for your soil, water and climate.
The Cornell Lab's 2026 native-plant guide explains how plants support insects and birds across the seasons. The National Wildlife Federation Native Plant Finder can help you search by ZIP code or ecoregion. A local native-plant society, extension office or conservation group can help confirm which plants are appropriate for your area. Avoid collecting plants from the wild.
Layer 2: shrubs, trees and safe cover
Birds need places to hide from weather and predators. A yard with only short lawn and one exposed feeder offers little shelter. Where space allows, combine groundcover, native grasses, shrubs and trees at different heights. Keep some branches and brush where they are safe and appropriate. A small unmowed patch can support insects and seedheads; it does not need to look neglected if you define its edges with a path or border.
Think about the view from a bird's perspective. A feeder should not leave a small bird exposed in the middle of a wide open lawn with no nearby escape cover, but it should not sit beside a dense branch that lets a cat or squirrel launch straight onto it. A quiet, partly sheltered location is a better starting point than the most decorative spot in the garden.
Layer 3: water for drinking and bathing
A shallow bird bath can be as simple as a wide plant saucer or sturdy dish. The water should be shallow, the surface should give birds a grip, and the sides should slope gently rather than drop into a deep bowl. Washington Department of Fish and Wildlife recommends a gradual slope, a rough surface and shallow water—typically one to three inches at the deepest point. Add a few clean stones if the dish is deeper, and keep the water fresh.
Place the bath where birds can see the surroundings and reach nearby cover without being hidden from predators. A little movement, such as a dripper, can make water easier for birds to notice, but a pump is optional. A plain saucer that is easy to empty and scrub is often a better first choice than a large decorative fountain that is difficult to clean.
Layer 4: nesting space, only when you can maintain it
A nest box is not a universal birdhouse. Different species need different entrance-hole sizes, interior dimensions, mounting heights and habitat. Some birds nest in cavities; others build open nests in shrubs or trees and will not use a box. Before installing one, identify the species you are trying to support and use a design recommended by a local wildlife agency or bird conservation group. Cornell Lab’s NestWatch guide to a good birdhouse explains why entrance size, drainage, ventilation, predator protection and access for cleaning matter. Place a box where it can be monitored without repeatedly disturbing nesting birds, and follow local guidance for cleaning it between seasons.
7. Choose a bird feeder that fits your yard
A feeder is optional. If you add one, choose it for the birds you want to observe, the seed you plan to offer and the amount of cleaning you can realistically do. A simple feeder that comes apart easily is often a better first purchase than a complicated multi-feeder station.
| Feeder type | What it suits | What to consider |
|---|---|---|
| Tube feeder | Sunflower seeds and smaller perching birds such as finches, chickadees and nuthatches. | Check that ports and perches are easy to clean; wet seed can spoil inside the tube. |
| Hopper feeder | Mixed seed or sunflower for a range of medium-sized backyard birds. | Choose a roof and drainage design that keep seed dry; larger birds may dominate it. |
| Platform feeder | Ground-feeding species and birds that prefer an open surface. | Droppings and wet seed can collect on the tray, so cleaning needs to be frequent. |
| Suet feeder | Woodpeckers, nuthatches and other birds that take high-energy suet. | Use a suitable cage and weather-appropriate suet; ordinary suet can turn rancid in heat. |
| Nyjer feeder | Finches and other small birds that feed on tiny Nyjer seed. | Use a feeder designed for tiny seed; old seed can dry out and be ignored. |
Where to put a feeder
Choose a quiet location that you can see from indoors and reach easily for refilling. Project FeederWatch suggests placing feeders near natural cover so birds have somewhere to retreat, while avoiding strong branches that let squirrels or cats jump onto the feeder; about ten feet can be a useful starting point. Treat that as a practical guide, not a universal measurement. Your yard's layout, predator activity and feeder design matter.
Window safety needs its own decision. Feeders placed more than 30 feet from windows reduce the chance that a bird will launch from the feeder and strike the glass. If that distance is not possible, placing the feeder within three feet of the window can reduce the speed of an impact. The in-between zone is the one to avoid where possible. Regardless of feeder distance, treat reflective or see-through glass with an effective exterior pattern or screen.
Keep the feeder away from places where cats can wait unseen. If outdoor cats regularly visit, reconsider feeding in that spot. A feeder should not create an easy hunting station. In areas with bears or other large wildlife, check local rules before putting food outside; some communities restrict feeders during particular seasons.
3. Brome Squirrel Buster Standard: a compact option when squirrels are a real problem
1.3 lb seed capacity · Four feeding ports · Weight-activated shroud · Tool-free disassembly
The Squirrel Buster Standard is not a required beginner feeder, but it is a useful example of a design aimed at yards where squirrels repeatedly empty a tube feeder. Brome lists a 1.3-pound capacity and four seed ports. When a squirrel's weight presses on the feeder, the outer shroud closes access to the ports. The feeder can be taken apart by hand for cleaning, and the maker recommends about 18 inches of clearance so a squirrel cannot reach over from a nearby branch or pole.
There are limits. The small capacity means more frequent refilling in a busy yard, and Brome specifically says the design will not deter grackles, starlings, chipmunks, opossums, bears or deer. It is also unnecessary if squirrels are not a problem. Before paying for a squirrel-resistant mechanism, try a well-positioned basic feeder and check whether a pole baffle or a different location solves the issue.
See Brome's Squirrel Buster Standard specifications and clearance guidance.
8. Which bird seed should beginners start with?
Seed choice depends on the birds in your region and the feeder you own. If you want a simple starting point for many common seed-eating songbirds, black oil sunflower is a practical option. Its thin shell and high oil content make it accessible to a broad range of birds, including cardinals, chickadees, finches, nuthatches and grosbeaks. It is not a universal food for every species, and it will not bring birds that do not naturally eat seed.
Other foods serve different groups. Nyjer is often used for finches; safflower may appeal to cardinals and some other larger-billed birds; peanuts can attract jays and other species; suet can help attract insect-eating birds in cooler weather. Do not buy a large mixed bag until you know which birds are visiting. Some inexpensive blends contain seeds that local birds ignore, leaving waste below the feeder.
4. Wagner's 52023 Black Oil Sunflower Seed: a simple starter seed
5 lb bag · Black oil sunflower seed · Single-seed option for compatible feeders
Wagner's 52023 is a straightforward five-pound bag of black oil sunflower seed. It is a useful example of starting with one familiar seed rather than a large blend with ingredients you may not need. Wagner's describes oil sunflower as one of its specialty seeds, and Project FeederWatch lists sunflower among the common foods used by a wide range of feeder birds.
The important caveat is not the brand but the feeding routine. Store seed in a cool, dry, rodent-resistant container. Refill only what birds are likely to eat before the next cleaning, discard seed that becomes wet or moldy, and sweep up hulls and spilled food beneath the feeder. If you see signs of illness or a local disease alert, follow current wildlife-agency advice rather than continuing to feed as usual.
See Wagner's wild bird food range and its guidance on choosing seed.
9. Set up a safe bird bath or water source
Birds use water for drinking and bathing, and a water source can attract visitors that never touch a feeder. You do not need a powered fountain. A shallow dish, plant saucer or simple bird bath is enough if it is stable, easy to clean and safe for small birds.
What makes a bird bath usable?
- Shallow water: Aim for a gradual edge and roughly one to three inches at the deepest point. Smaller birds may prefer even shallower water.
- Grip: Avoid a smooth, slippery basin. A rough surface or a few clean stones can help birds stand securely.
- Easy access: Choose a place with a clear view and nearby cover, but not a hidden corner where a cat can wait.
- Fresh water: Replace water daily when possible, and scrub the basin at least weekly or whenever it becomes visibly dirty.
- Winter planning: In freezing climates, use a purpose-built birdbath heater only if it can be installed and maintained safely. Never add antifreeze or chemicals to keep water from freezing.
Project FeederWatch notes that a simple dish or shallow pan can work just as well as a commercial bird bath and recommends changing the water every day. A dripper or small moving-water feature can make a bath easier to notice, but it adds parts that also need cleaning. If a basic dish is all you can maintain, use the dish.
10. Prevent birds from hitting windows
Window collisions are one of the most important safety issues to address before encouraging more birds into a yard. Glass can reflect trees and sky, making a window look like open habitat. Clear glass can also look like a passage to a bird. A single decorative decal is not enough if large gaps remain around it.
American Bird Conservancy recommends patterns that leave no spaces larger than two inches, so birds do not see a fly-through opening. Apply markers or film to the exterior surface of the glass, where they interrupt reflections. Screens, closely spaced cords or other properly designed treatments can also help. For problem windows, cover the whole pane rather than putting one sticker at eye level.
5. Feather Friendly DIY markers: a window-safety treatment for problem glass
1/4 in. markers · 2 in. spacing · 100 ft roll · Approximately 16 sq ft of glass coverage
Feather Friendly's small-format DIY kit is designed to leave a repeated marker pattern on the exterior of a window. The manufacturer lists 1/4-inch markers spaced two inches apart, with one 100-foot roll covering about 16 square feet. The kit includes measuring guides and a squeegee to help keep the rows consistent. White markers are intended for reflective glass; the maker also offers darker markers for clear or fly-through glass.
This is a more involved purchase than a single decal, and it needs to cover the problem glass with the specified pattern. The manufacturer says to apply it to the outside surface and not install below 50°F. Check the glass type, exact coverage and current installation instructions before ordering. For a small temporary project, a properly spaced exterior-safe window marker or screen may be a better fit.
See Feather Friendly DIY marker sizes, coverage and installation instructions.
There is also a simple feeder-placement rule worth remembering: place feeders either very close to the window (within three feet) or well away (more than 30 feet), rather than in the middle distance. This does not make untreated glass safe. If birds are striking a particular pane, treat the pane itself and move feeders or baths while you address the problem.
11. Keep feeders, baths and the yard healthy
Feeding birds is a responsibility, not a set-and-forget decoration. Feeders concentrate birds in one place, and contaminated seed, droppings or dirty water can help pathogens spread. A simple cleaning routine is part of the cost of having a feeder.
A realistic cleaning schedule
| Task | Practical routine | When to do more |
|---|---|---|
| Seed and suet feeders | Clean every week or two, following the feeder maker's instructions. | More often during heavy use, wet weather or a local disease concern. |
| Bird bath | Replace water daily; scrub at least weekly or whenever visibly dirty. | Clean more often in heat, algae growth or heavy use. |
| Ground below feeders | Remove wet hulls, spilled seed and accumulated droppings. | Check after rain and whenever rodents or other unwanted visitors appear. |
| Stored seed | Keep it sealed in a cool, dry, pest-resistant container. | Discard anything wet, clumped, musty or visibly moldy. |
Project FeederWatch recommends taking feeders apart, scrubbing away debris, washing with warm water and dish soap, rinsing thoroughly and allowing parts to dry before refilling. Follow the specific feeder instructions, because not every model is dishwasher-safe. Wash your hands after handling seed, feeders or bird baths, and do not clean feeder parts in the same area where you prepare food.
If a bird looks sick, or you find a dead bird near a feeding area, stop and check current guidance from your state wildlife agency or local wildlife rehabilitator. The CDC advises keeping pets away from sick or dead wild birds and currently recommends removing feeders and baths for two weeks if you find a sick or dead bird. Follow your state wildlife agency if it issues different outbreak-specific advice. Do not handle a sick or dead bird with bare hands. Disease advice can change by region and outbreak, so follow current local instructions.
Keep cats, pesticides and outdoor lights in mind
Keep pet cats indoors or use a secure outdoor enclosure. A feeder can attract small birds to a predictable location, so it should not sit beside a place where a cat can hide and pounce. Avoid broad-spectrum pesticides and insecticides where possible; many birds feed insects to their young, even when adults eat seeds or fruit. Leave some leaf litter and natural plant structure where it is safe to do so.
During migration, unnecessary outdoor lighting can disorient birds moving at night. Turn off lights you do not need, use timers or motion sensors, and shield fixtures so light is directed downward. Close curtains or blinds at night where indoor light spills toward windows. These steps help make a yard more bird-friendly without requiring another purchase.
12. Take your birdwatching beyond the backyard
Once you recognize a few regular visitors, try a local park, wetland, shoreline, nature preserve or easy trail. A different habitat often brings a different set of birds. You do not need a rare sighting to make the trip worthwhile. Watch the edges where habitat changes: a line of shrubs beside a field, the margin between water and reeds, or a tree line beside an open lawn.
Choose a beginner-friendly place
- Look for a short, well-marked loop with more than one habitat type.
- Start early if the location is known for morning bird activity, but do not assume every species is active at the same time.
- Check opening hours, seasonal closures, access rules and whether dogs are allowed.
- Use a local checklist or eBird hotspot to learn what has been reported recently.
- Bring water, weather-appropriate layers, a phone and the same basic supplies you would take on an easy walk.
If you are planning a trail outing as well as birdwatching, our beginner hiking mistakes and gear guide covers route choice, footwear, weather and common preparation errors. For a shoreline or lake outing, read Kayaking for Beginners before treating a boat trip as a birdwatching shortcut; observing wildlife from the water still requires suitable paddling skills, safety equipment and respect for protected areas.
Follow a few simple birding ethics
Stay on marked trails where they exist, respect private property and obey posted closures. Give birds room to behave naturally. Do not approach nests, repeatedly flush a bird for a better view, handle wild birds or use playback to draw them closer. Be especially cautious around rare or sensitive species. If a bird changes its behavior because of your presence, you are probably too close.
Photographs should never take priority over the bird's welfare. Avoid flash near roosts and nests, do not block paths or viewing areas, and share sensitive location information carefully if a rare bird is nesting. The American Birding Association Code of Birding Ethics is a useful reference for new and experienced birders alike.
13. A simple 30-day beginner birding plan
A short routine builds better skills than buying everything at once. Use this plan as a starting point and adjust it for weather, daylight and the birds in your area.
Week 1: learn the regular visitors
Choose one observation spot and spend ten minutes there on several different days. Write down size, shape, behavior and habitat before searching for names. Identify three common species with Merlin or a regional field guide. Do not worry about every call in the background.
Week 2: practice with binoculars
If you have access to binoculars, practice finding a stationary bird or object before following moving subjects. Adjust the barrels and eyecups, learn the focus wheel and note whether the size feels comfortable. If you are shopping, try more than one model in person if possible. Do not buy a camera or spotting scope yet.
Week 3: improve one part of the habitat
Choose one small change: add a shallow water dish, plant a locally appropriate native shrub, leave a small patch of seedheads standing or treat a problem window. If you add a feeder, start with one feeder and one food type. Set a cleaning reminder before you fill it.
Week 4: visit a local birding spot and record a checklist
Choose a nearby park or refuge, check recent sightings and spend half an hour observing. Record only birds you can identify with confidence. Compare your list with what you see at home. You may notice that the yard is best for common feeder birds while the park has waterbirds, raptors or species that stay high in the canopy.
14. Backyard birdwatching setup checklist
Use this list to check whether a new setup is practical and safe before buying anything.
- Choose a quiet observation spot with a clear view and somewhere comfortable to sit.
- Make a short list of common birds in your region and season.
- Use a free bird ID app or a regional field guide; download offline bird packs before remote outings.
- Try binoculars before buying and choose a size that fits your hands and eyes.
- Plant or preserve native trees, shrubs, grasses or flowers suited to your ZIP code or ecoregion.
- If you add a feeder, choose one that matches the seed and birds you want to observe.
- Place the feeder where it is visible and serviceable, with safe cover nearby and no easy cat ambush point.
- Keep feeders within three feet of a window or more than 30 feet away; treat problem glass with a proper exterior pattern or screen.
- Offer shallow, clean water in a basin birds can grip and exit easily.
- Set a recurring cleaning routine for feeders, baths and the ground beneath them.
- Keep pet cats indoors or contained and avoid pesticides where birds forage.
- Follow local wildlife, bear and park rules; remove feeders if local disease guidance calls for it.
- Observe from a respectful distance and leave nests, roosts and sensitive habitat undisturbed.
For a related project, see small, low-pressure ways to build social connection.
Birdwatching for beginners FAQs
What equipment do I need to start birdwatching?
You can begin with a quiet observation spot, a notebook or phone notes and a free bird ID app. Binoculars are useful when birds are distant, but they are not required for the first session. For backyard birdwatching, native plants and a shallow water dish can be more useful than buying several feeders. Add equipment only when you know what you want to observe.
What are the best binoculars for beginner birdwatching?
An 8x42 pair is a practical starting point for many adults because it offers a wide view, useful light gathering and a relatively steady image. An 8x32 is lighter for walking, while 10x42 gives more magnification but can be harder to hold steady. Try the fit, eye relief, focus wheel and weight before buying; the most expensive model is not automatically the best match.
Is 8x42 or 10x42 better for birdwatching?
For most beginners, 8x42 is easier to use because the field of view is wider and hand shake is less noticeable. A 10x42 makes distant birds appear larger, which can help across open water, but it is harder to keep a moving bird in view. Choose 10x only if you can hold the binoculars steadily and prefer the extra reach.
How do I identify a bird I see in my backyard?
Write down four clues: size and shape, color pattern, behavior, and habitat. Note the bill, tail, posture, movement and where the bird is feeding. Then use a regional guide or Merlin Bird ID to compare likely species for your location and season. Check that the app's suggestion matches what you actually observed rather than accepting the first result.
Is Merlin Bird ID free?
Yes. Merlin Bird ID is a free app from the Cornell Lab of Ornithology. It can suggest birds from a short question flow, photo, sound recording or regional list. Download the relevant bird pack before traveling somewhere with limited service, and treat automated suggestions as a starting point that should be checked against the bird's visible features and habitat.
How do I attract birds to my backyard?
Start with native plants that provide food and cover, a clean shallow water source and safe places to shelter. A feeder can bring some seed-eating species closer, but it is optional and needs regular cleaning. Keep cats away, reduce pesticide use and make reflective windows visible to birds. The species you attract will depend on your region, habitat and season.
What is the best bird seed for beginners?
Black oil sunflower seed is a useful first choice for many common seed-eating backyard birds because its thin shell and high oil content make it accessible to several species. It will not attract every bird. Choose Nyjer for some finches, suet for certain insect-eating birds and other foods only when they match the species in your area. Avoid letting seed become wet or moldy.
Where should I place a bird feeder?
Place it in a quiet, visible location that you can reach for cleaning, with natural cover nearby but not a strong branch that lets squirrels or cats jump onto it. About ten feet from cover can be a useful starting point. For windows, place a feeder within three feet of the glass or more than 30 feet away; treat the glass itself with an effective exterior pattern or screen if collisions are a risk.
How often should I clean a bird feeder?
Project FeederWatch recommends cleaning seed and suet feeders every week or two, and more often during heavy use or wet weather. Take the feeder apart as directed, remove debris, wash with warm water and dish soap, rinse thoroughly and let it dry before refilling. Clean up spilled seed and droppings beneath it as well.
How deep should a bird bath be?
A gradual, shallow basin is best. Washington Department of Fish and Wildlife describes one to three inches at the deepest point as a typical range, while smaller birds may prefer shallower water. Use a rough surface or clean stones for footing, change the water daily when possible and scrub the bath at least weekly or whenever it becomes dirty.
Do bird feeders cause disease?
Feeders can help pathogens spread when birds crowd together or come into contact with contaminated seed, droppings and surfaces. Regular cleaning, dry seed, good spacing and removing wet or moldy food reduce risk but do not eliminate it. If you see sick or dead birds, follow your state wildlife agency's current guidance; it may recommend temporarily taking down feeders and baths.
Can I watch birds without feeding them?
Absolutely. Many birds do not visit feeders, and natural habitat can support a wider range of species. Watch from a window, garden, park, shoreline or trail. Native plants, water, shelter and reduced pesticide use can make a yard more useful to birds without offering seed. Feeding is an optional way to observe some species, not a requirement for birdwatching.
Is birdwatching difficult for beginners?
No special experience is required, but identifying birds takes practice. Start with common local species and focus on one or two visible clues at a time. A short, repeated observation session is often more useful than trying to learn dozens of species in one day. You will get better at recognizing shapes, calls and behavior as you see the same birds in different conditions.