
Your first car-camping weekend does not need to turn into a garage full of gear. Start with a dry place to sleep, bedding suited to the forecast, dependable light, safe food storage, water, and a few practical supplies. Add chairs, a larger shade shelter, and a power station only when they solve a real problem for the trip. This guide walks through the essentials, explains what to check before you leave, and looks closely at nine products that can make a campground setup more comfortable.
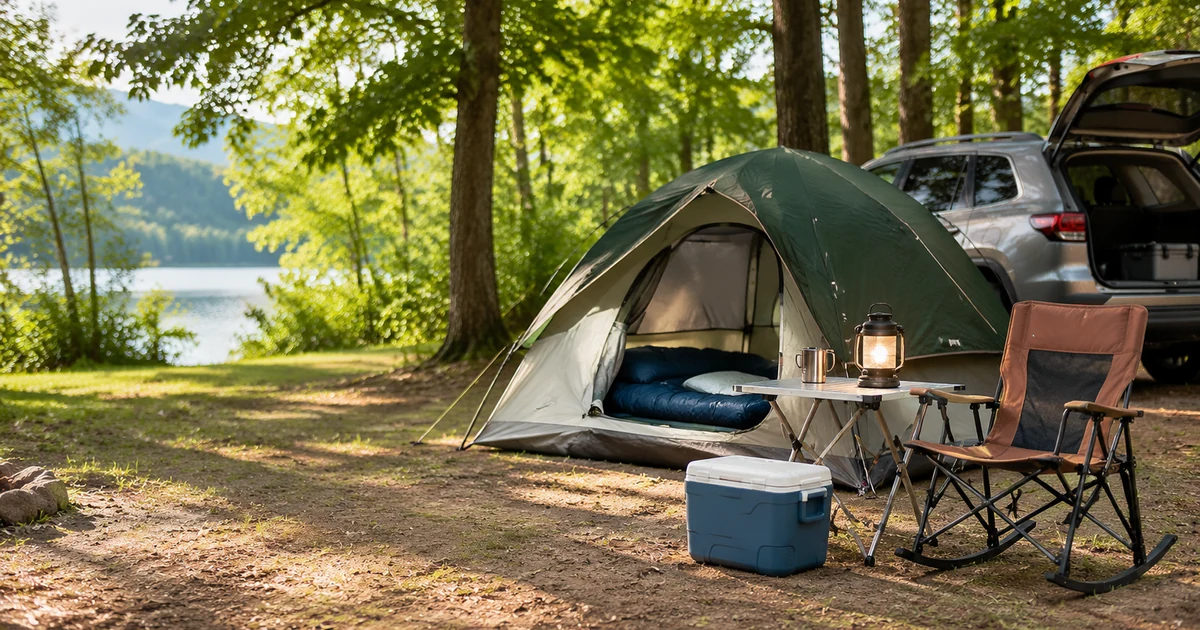
Car camping means you can park close to your campsite and carry equipment from the vehicle rather than on your back. That makes it a forgiving way to try camping for the first time: you can bring a roomier tent, a heavier sleeping pad, a real cooler, and a comfortable chair without worrying about every pound. The trade-off is that a car can tempt you to pack too much. A well-planned weekend kit is easier to set up, easier to pack away, and less likely to leave you searching through bags after dark.
What you actually need for a first car-camping trip
Think in systems rather than shopping categories. The first system keeps you sheltered and warm. The second covers food, water, and basic hygiene. The third helps you see, navigate, and deal with small problems. Everything else is there to make the campsite more comfortable.
1. Shelter: a tent that fits the people and the gear
Choose a tent based on the number of people who will sleep in it, not the biggest number printed on the carry bag. A four-person tent is generally a compact sleeping space for four people; it is not necessarily a comfortable room for four adults, their bags, and wet shoes. The National Park Service makes the same distinction in its camping packing guidance: the stated capacity is about sleeping space, not spare room for all your equipment.
For two adults, a four-person tent can be a sensible budget choice if you are happy to keep most gear in the vehicle. If you want room to change clothes, keep bags inside, or wait out a rainy afternoon, consider sizing up. Check the floor dimensions, peak height, door arrangement, rainfly coverage, ventilation, and whether the tent has a vestibule. A tent with no vestibule leaves you to decide where muddy footwear and damp gear will go.
2. Sleep: a sleeping bag and a pad work together
A sleeping bag provides insulation around your body, but the ground can pull heat away through the underside of the bag. A sleeping pad is therefore part of the sleep system, not an optional mattress topper. Look for the pad's R-value when cold-weather performance matters. Thickness alone does not tell you how well a pad resists heat loss.
Read temperature labels carefully. A manufacturer's stated minimum temperature is not automatically a comfort temperature for every sleeper. Personal warmth, clothing, wind, humidity, the pad underneath you, and the condition of the bag all affect how warm you feel. If the forecast is close to the bag's stated limit, choose a warmer system rather than assuming the label guarantees a comfortable night.
3. Light: use a lantern and keep a personal light handy
A lantern is useful for lighting a table or the inside of a tent, but it does not replace a headlamp or flashlight. You need a hands-free light to walk to the restroom, find a dropped item, or pack up after sunset. Bring spare batteries or a charged backup, and keep one light where you can reach it without unpacking the whole car.
4. Food and water: plan storage before you leave home
If you are bringing meat, dairy, leftovers, or other perishable food, use a cooler and enough ice or frozen packs to keep the food at 40°F (4.4°C) or below. The USDA recommends keeping raw foods separate from ready-to-eat food, and not relying on a cooler once its ice has melted. A cooler's advertised capacity is not the same as usable food capacity once ice, containers, and drinks are inside.
Bring drinking water for the trip, plus enough for cooking and washing. The National Park Service suggests at least two liters per person per day as a starting point, with more needed in hot conditions or during strenuous activity. At a developed campground, check whether potable water is available before deciding how much to carry. Never assume that clear lake or stream water is safe to drink.
5. Safety and comfort: the small items that prevent avoidable problems
Pack a first-aid kit, any personal medication, sun protection, insect repellent, a warm layer, rain protection, a map or offline directions, a phone charging plan, toiletries, hand-cleaning supplies, and rubbish bags. Check campground rules for fires, food storage, quiet hours, pets, and vehicle limits before leaving. In bear country or other wildlife areas, follow the site's food-storage instructions; many parks require food to be stored in a vehicle or a designated locker, and food should never be kept inside the tent.
The complete weekend car-camping checklist
This list is designed for two adults spending two nights at a developed campground with vehicle access. Add or remove items for the season, the forecast, the campground's facilities, and the activities you plan to do. It is a planning checklist, not a claim that every item is required at every site.
Shelter and sleep
- Tent, poles, rainfly, stakes, guylines, and the correct carry bag.
- Groundsheet or footprint if recommended for the tent; make sure it does not extend beyond the tent floor where rain can collect.
- Sleeping bag suited to the expected overnight low.
- Sleeping pad with a suitable R-value for the season and ground temperature.
- Pillow or a stuff sack filled with spare clothing.
- Dry sleep clothes and an extra warm layer.
Camp lighting and power
- Lantern for shared campsite lighting.
- Headlamp or flashlight for each person.
- Spare batteries or charging cable and a small power bank.
- Optional portable power station only if you have a real use for AC power or several devices.
Food, cooking and water
- Cooler, ice or frozen packs, and sealed food containers.
- Drinking water and a separate container for cooking and washing.
- Camp stove and the correct fuel, if permitted at the campground.
- Pot or pan, cooking utensils, plates, bowls, cups, and cutlery.
- Food, snacks, coffee or tea, and a simple meal plan.
- Handwashing supplies, dish soap, sponge, rubbish bags, and paper towels or a reusable cloth.
The nine products reviewed below do not include a camp stove or cookware set. If you plan to cook, add those separately and check the campground's current fire and stove rules. Never use a fuel-burning stove, charcoal grill, lantern, or heater inside a tent, vehicle, camper, or other enclosed space.
Clothing and personal items
- Clothing layers for the actual forecast, including a warm layer for evenings.
- Rain jacket, extra socks, comfortable shoes, and sleepwear.
- Hat, sunglasses, sunscreen, and insect repellent.
- Toothbrush, toothpaste, soap, towel, toilet paper, and personal hygiene items.
- Prescription medication and any personal medical supplies.
Safety, navigation and campsite supplies
- First-aid kit and blister care.
- Phone with offline maps downloaded and a charged battery.
- Reservation details, campground map, and emergency contact information.
- Multi-tool or small repair kit, duct tape, and a lighter or fire starter where fires are permitted.
- Waterproof bag for important documents and electronics.
- Food-storage containers or bear-safe storage equipment required by the campground.
Optional comfort items
- Folding camp chair.
- Small side table or camp kitchen table.
- Pop-up canopy or dining shelter, if the site allows it and the weather is suitable.
- Portable power station for equipment that genuinely needs it.
- Books, cards, binoculars, camera, or other low-fuss activities.
How to build a comfortable sleep system
For a first trip, it is worth spending more thought on sleep than on decorative campsite accessories. A cold or uncomfortable night can make the next day feel much longer. The three decisions are tent space, sleeping-bag temperature, and pad insulation.
Match the tent's floor plan to the people sleeping in it
Look at the actual floor dimensions. A tent that fits a queen airbed may leave little clear floor area for bags, shoes, or moving around. If two adults are sharing a tent, decide in advance whether gear will stay inside, in the car, or under a protected vestibule. If you are camping with children, allow space for their bedding and for getting in and out without stepping over everyone else.
Understand sleeping-bag temperature labels
The Coleman Brazos 20°F bag reviewed below is listed by the manufacturer for temperatures as low as 20°F and for campers up to 5 ft 11 in. That is useful product information, but it should not be read as a promise that every person will sleep comfortably at 20°F. The product page does not provide an ISO/EN comfort rating in the information reviewed for this guide. For a mild-weather first trip, choose a bag with a margin below the forecast low; for colder conditions, use a sleeping bag and pad designed for those conditions rather than relying on extra clothing alone.
Do not choose a sleeping pad by thickness alone
The Coleman self-inflating pad is 2.5 inches thick, which can make the ground feel less harsh. However, no verified R-value was found for this model. If you camp in cold weather, look for a pad with a published R-value and compare it with the expected ground temperature. If you are choosing a pad mainly for comfort at a mild-weather campground, thickness, width, packed size, weight, and ease of inflation may matter more.
Food, water and cooler safety
Food planning is one of the easiest parts of a first camping trip to underestimate. A small cooler can be fine for drinks and a few snacks, but a two-night trip with raw ingredients, dairy, and meals for two people needs more space. The Coleman Chiller linked below is the 48-quart model associated with model number 2231509. It is a more useful size for a weekend food-and-drink setup than a 9- or 16-quart personal cooler, although the usable space still shrinks once ice and containers are added.
Pack a cooler so it stays cold
- Pre-chill the cooler and the food before loading it. A cooler that starts warm uses its ice to cool the container as well as the food.
- Freeze water bottles or use frozen packs as part of the cold source. Keep raw meat sealed and separated from ready-to-eat food.
- Pack food in meal order so you are not opening the lid repeatedly to find items at the bottom.
- Keep the cooler closed and shaded where possible. A separate drinks cooler can help if people will open it often.
- Use a thermometer if you are carrying higher-risk perishables. Keep cold food at or below 40°F (4.4°C).
- If the ice has melted and you cannot confirm the food stayed cold, do not rely on smell or appearance to decide whether it is safe.
The USDA's outdoor food-safety guidance says perishable food should be kept at 40°F or colder. Food should not remain in the 40°F–140°F danger zone for more than two hours, or more than one hour when the outdoor temperature is above 90°F. These are food-safety limits, not cooler performance claims.
Keep water planning simple
For a developed campground, find out whether drinking water taps are available and whether they are potable. Bring enough water for the drive, arrival, and the first part of the stay, then refill from a verified source if the campground provides one. If you plan to use water from a natural source, treat it using a method suitable for the likely contaminants; a clear-looking stream is not proof of safe water. Our backpacking water-filter comparison explains what common filters can and cannot remove, although a developed car-camping site may make a filter unnecessary.
Store food with wildlife in mind
Follow the exact campground's rules. Some sites allow food to be stored in a closed vehicle; others require a bear locker or another approved method. Do not keep food, snacks, toiletries, or rubbish inside the tent in wildlife areas. The National Park Service's campsite safety guidance explains why keeping a clean camp and following local food-storage rules protects both visitors and wildlife.
How to set up your campsite
When you arrive, resist the urge to unload everything at once. A simple order makes the site easier to use and reduces the chance of discovering at bedtime that a pole, stake, or rainfly is still in the car.
Step 1: Read the site before unpacking
Check the ground for low spots, drainage channels, sharp stones, dead branches overhead, and the direction of the wind. Do not pitch the tent in a dip where water can collect. Use the tent pad or designated area if the campground provides one. Check the site map and local rules before moving picnic tables, tying lines to trees, or placing a canopy.
Step 2: Pitch the tent and check the rainfly
Lay out the tent, identify the door direction, and assemble the poles according to the instructions. Stake the corners and use the rainfly and guylines as designed. Make sure the fly is tensioned and does not press against the inner tent where that could transfer water. Keep ventilation openings clear. Practice pitching the tent at home before the trip; the NPS recommends testing equipment before leaving so you can identify missing pieces and unfamiliar steps while you still have time to fix them.
Step 3: Create separate sleeping, cooking and sitting areas
Keep the sleeping area clean and dry. Put the cooler where it is easy to reach but not in direct sun if you can avoid it. Place cooking equipment on a stable, level surface and follow the stove manufacturer's clearance instructions. Keep flames and hot equipment away from the tent, canopy fabric, vehicle, and dry vegetation. A lantern can light the table, while each person keeps a headlamp or flashlight for walking around.
Step 4: Anchor shade shelters carefully—or leave them packed
A 10 × 10 ft canopy can create a useful shaded dining area, but it is a large piece of equipment. It needs enough space, secure anchoring, and suitable weather. A water-resistant canopy is not a storm shelter, and a sidewall can catch wind. Follow the manufacturer's setup and anchoring instructions, use the supplied stakes or suitable weights, and take it down if conditions become windy. Never assume that a canopy is safe just because it is advertised for outdoor use.
Step 5: Put food and rubbish away before dark
Store food, toiletries, and rubbish according to campground rules before you go to bed. Wash dishes and wipe down surfaces. Keep the path to the restroom clear, and put a light where you can reach it from the sleeping area. If a fire is allowed, follow the site's fire rules and extinguish it completely before leaving it unattended or going to sleep.
Nine car-camping products reviewed: what each one is good for
The products below are the exact models identified from the Amazon links supplied for this guide. Specifications come from manufacturer information and retailer listings. Buyer-feedback notes summarize accessible review themes; they are not results from hands-on TestedWise testing. Marketplace ratings are snapshots captured during research on November 13, 2026, and may change. Where an Amazon page groups several sizes or variants, that limitation is called out rather than presenting the rating as a model-specific test score.
| Product | Key details | Best role in a car-camping setup | Main trade-off |
|---|---|---|---|
| Coleman Sundome 4-Person Tent | 9 × 7 ft floor; 4 ft 11 in center height; 9.15 lb; rainfly; no vestibule | Budget shelter for one or two adults | Four-person capacity is tight; little covered gear storage |
| Coleman Brazos 20°F Sleeping Bag | 75 × 33 in; rectangular; for users up to 5 ft 11 in; 20°F manufacturer rating | Cool-weather campground sleeping | Bulky and heavy compared with backpacking bags; temperature label is not a comfort guarantee |
| Coleman Self-Inflating Pad with Pillow | 76 × 25 × 2.5 in; about 6.4 lb; built-in pillow | Extra cushioning at a drive-up campsite | No verified R-value found; heavy for carrying far |
| GCI Outdoor Freestyle Rocker | 12.1 lb; 250 lb capacity; spring-action rocking | Comfortable seating at a roomy campsite | Bulkier and heavier than a basic folding chair |
| Coleman Chiller 48-Quart Cooler | 48 qt; 8.1 lb; 2-way handles; drain; fits 2 L bottles upright | Food and drink storage for a short trip | Ice and containers reduce usable space; no powered temperature control |
| Etekcity CL10 Lantern 4-Pack | 154 lumens max per lantern; 30 LEDs; 3 AA batteries each; up to 50 hours claimed | Ambient light around the tent and table | Battery-powered, cool-white light; output can fade before the claimed maximum runtime |
| GCI Outdoor Compact Camp Table 20 | 18 × 20 × 24 in; 4 lb; 60 lb capacity; seats up to two | Small side table for drinks, snacks and light prep | Too small to replace a family dining or full camp-kitchen table |
| CROWN SHADES 10 × 10 Canopy with One Sidewall | 100 sq ft shade; UPF 50+; one removable sidewall; about 31 lb | Optional shade for a large, open campsite | Bulky and heavy; requires proper anchoring and calm conditions |
| BLUETTI AC180 Power Station | 1,152Wh LiFePO₄; 1,800W AC output; 2,700W surge; about 35.3 lb | Optional power for multiple devices or higher-demand equipment | Expensive and heavy; high-wattage use drains the battery quickly |
1. Coleman Sundome 4-Person Camping Tent
Model 2206869 · ASIN B0D7QN9S9Q · 9 × 7 ft floor · 9.15 lb
The Sundome is a straightforward dome tent with a 63-square-foot floor, a 4 ft 11 in center height, two windows, a ground vent, and a rainfly. Coleman lists a WeatherTec system with a tub-style floor, welded corners, and inverted seams, and says the frame has been tested to withstand winds up to 35 mph under its test conditions. That is a manufacturer test statement, not a reason to stay in a tent during dangerous wind or storms.
The useful detail is the floor plan. Coleman says the tent fits one queen-size airbed, which gives you a practical sense of the interior: a queen mattress can occupy most of the floor, leaving limited room for luggage. There is no vestibule, so wet shoes and larger bags need another storage plan. For one or two adults who keep most gear in the car, that can be a reasonable compromise. For four adults, or two people who want to store all their gear inside, it will feel cramped.
Feedback on Coleman's product page includes buyers who found it easy to set up and adequate for keeping rain out, alongside individual reports of missing stakes, a pole that broke during first setup, and zipper wear. Those reports are worth checking against the current package contents and return policy; they do not establish a product-wide failure rate. Set it up at home before your trip and inspect every pole, clip, seam, zipper, stake, and rainfly.
- Best for: one or two adults on a budget who want a simple drive-up campsite tent.
- Think twice if: you need a vestibule, stand-up room, or comfortable sleeping space for four adults.
- Before checkout: confirm the selected option is the 4-person Spruce Green model 2206869, and check whether the current package includes all stakes and accessories shown in the listing.
2. Coleman Brazos 20°F Sleeping Bag
Model 2205665 · ASIN B0D643DKJW · 75 × 33 in · rectangular shape
The Brazos 20°F is a rectangular synthetic sleeping bag designed for campers up to 5 ft 11 in. Coleman lists a Thermolock draft tube along the zipper, Fiberlock construction to help limit insulation movement, a no-snag zipper, a stuff sack, machine-washable care, and a five-year limited warranty. Two compatible bags can be zipped together for a wider shared setup.
Its appeal is simplicity: it is a roomy, familiar sleeping-bag shape rather than a tapered backpacking bag. That can be comfortable for casual campground use, but it takes up more room in the car and weighs around 5.3 lb. It is not a good choice for someone who plans to carry a full overnight kit on foot.
One point deserves careful wording. Coleman describes the bag as suitable for temperatures as low as 20°F. The product information reviewed for this guide does not show an ISO/EN comfort rating, so do not assume that 20°F is a guaranteed comfort temperature for every sleeper. If the forecast approaches that figure, choose a warmer system and pay attention to the pad underneath you. Customer feedback on this model tends to value its soft lining, roomier rectangular cut, and price; the main practical compromises are bulk, weight, and the need to match the bag to the sleeper's height and cold tolerance.
- Best for: car campers who want a simple rectangular bag for cool-weather trips.
- Think twice if: you are taller than 5 ft 11 in, want a compact backpacking bag, or need a clearly published comfort rating for cold conditions.
- Before checkout: verify the selected option is the 20°F Brazos model, not a 30°F version or a different size.
3. Coleman Self-Inflating Sleeping Pad with Pillow
Model 2000016960 · ASIN B00BF9IYO4 · 76 × 25 × 2.5 in · about 6.4 lb
This pad combines foam and an air chamber, measures 76 by 25 inches, and includes a built-in pillow. At 2.5 inches thick, it gives more cushioning than a thin foam mat and can be appealing if you sleep on your side or dislike feeling the ground through a basic pad. The self-inflating design is convenient, but it still needs time for the foam to expand; you may need to add a little air by mouth to reach the firmness you prefer.
The important missing specification is an independently verified R-value. Thickness tells you about cushioning, not the pad's resistance to heat loss into cold ground. The pad is also relatively heavy at around 6.4 lb, which is not a concern when the car is nearby but matters if you later move into backpacking.
Accessible buyer feedback commonly points to the comfort and convenience of the thicker surface, while critical reports mention slow inflation, valve issues, and air loss. Treat it as a comfort-oriented campground pad, inspect the valves before leaving home, and test it overnight in the backyard if possible. If you expect cold ground, choose a pad with a published R-value rather than guessing from thickness.
- Best for: drive-up camping where comfort and a built-in pillow matter more than packed weight.
- Think twice if: you need a documented insulation rating or a lightweight pad for carrying on a trail.
- Before checkout: check the valve design, included pillow, packed dimensions, and current warranty details for the exact listing.
4. GCI Outdoor Freestyle Rocker Camping Chair
Model 37072 · ASIN B00P2XZKZ0 · 12.1 lb · 250 lb capacity
The Freestyle Rocker is a folding chair with GCI's Spring-Action Rocking Technology. It opens to about 24.4 × 25 × 34.8 inches, has a breathable mesh back, a built-in beverage holder, a carry handle, and a 250 lb stated weight capacity. GCI lists a three-year warranty for the current product page.
The rocking motion is the reason to choose this chair. Amazon's listing showed 4.8 out of 5 from 46,103 ratings when checked on November 13, 2026. Buyer feedback often praises the comfort and smooth rocking action. The trade-off is portability: at about 12 lb, it is heavier and bulkier than a basic folding camp chair. Some retailer feedback also mentions trim or fabric wear after extended use, so inspect the stitching and fabric around high-stress points.
- Best for: car campers who spend a lot of time sitting at the campsite and value the rocking motion.
- Think twice if: your trunk is small, you need to carry the chair far, or you want the lightest possible seat.
- Before checkout: confirm the Cinnamon color and model 37072, and compare the folded dimensions with your vehicle storage space.
5. Coleman Chiller 48-Quart Cooler
Model 2231509 · ASIN B0GFPPZKGR · 48 qt · 8.1 lb
This is the 48-quart Chiller, not the smaller 16-quart size. The Amazon URL opens a Coleman Chiller size-family page, but the product information associated with the supplied ASIN identifies model 2231509. Coleman lists a 48-quart capacity, two-way handles, a drain, and enough height for 2-liter bottles to stand upright. The published capacity is up to 76 cans; another retailer's packing example is 31 cans with 24 lb of ice. Those figures describe different packing assumptions, so do not treat the cooler as having room for 76 cans plus a full weekend of food and ice.
Amazon's family listing displayed 4.6 out of 5 from 16,937 ratings at the time of review. That page groups several Chiller sizes, so the score should not be read as a 48-quart-only rating. The practical positives are the relatively low empty weight, simple handles, and drain. The main limitation is insulation: the product is a passive cooler, not a refrigerator, and its performance depends on pre-chilling, ice quantity, how often the lid is opened, and outside temperature.
- Best for: a couple or small group bringing drinks and perishable food to a drive-up campsite.
- Think twice if: you need several days of high-performance ice retention in hot weather or want a wheeled cooler.
- Before checkout: confirm the selected size is 48 qt / model 2231509. The parent page offers multiple capacities, and the size selector matters.
6. Etekcity CL10 LED Camping Lanterns, 4-Pack
Model CL10 4-Pack · ASIN B01C5QSENQ · 30 LEDs · 154 lumens maximum per lantern
This four-pack gives you four small, collapsible lanterns, each powered by three AA batteries. The listing specifies 30 LEDs, 360-degree light, up to 154 lumens, water-resistant construction, and up to 50 hours of runtime. Twelve AA batteries are included in the pack.
Amazon showed 4.7 out of 5 from 50,188 ratings when checked on November 13, 2026. The large review base and low-complexity design make it a practical value option for ambient campsite lighting. An independent Travel + Leisure test found that the lantern illuminated a medium-size area well, but the light was a cool, bright white, there was no warmer color setting, and brightness had noticeably fallen after 24 hours of continuous use. The test measured about 140 lumens, slightly below the 154-lumen maximum in the listing.
The takeaway is not that the lantern is unsuitable; it is that the 50-hour figure should not be interpreted as 50 hours at full brightness. Use the lantern for the table or tent, carry a separate headlamp for moving around, and keep spare batteries available.
- Best for: inexpensive, distributed light around a campground and as a backup during power outages.
- Think twice if: you want rechargeable batteries, warm ambient light, or a single high-output lantern for a large area.
- Before checkout: confirm the four-pack and check whether batteries are included in the current offer.
7. GCI Outdoor Compact Camp Table 20
Model 39126 · ASIN B00HKCXVWU · 18 × 20 in tabletop · 4 lb · 60 lb capacity
The Compact Camp Table 20 is a small aluminum side table, not a full-size dining table. It opens to about 18 × 20 × 24 inches, folds to a compact package, weighs around 4 lb, and supports up to 60 lb. GCI describes the top as heat-resistant and the design as suitable for two people.
Its compact size is the point. It can hold a lantern, drinks, snacks, a small stove accessory, or a couple of plates. It is not large enough to serve as the main food-preparation surface for a family or a full camp kitchen. The telescoping legs help with storage, but any folding mechanism should be opened and locked fully before weight is placed on the table.
- Best for: two-person campsites where a light side table is more useful than a bulky dining table.
- Think twice if: you need space for several people to eat at once or want a full cooking station.
- Before checkout: confirm the 39126 Compact Camp Table 20, not a different GCI table with a similar name.
8. CROWN SHADES 10 × 10 Pop-Up Canopy with One Sidewall
Model RS100H-S1 · ASIN B09X2YQRHL · 100 sq ft shade · about 31 lb
This is a 10 × 10 ft pop-up canopy with one removable sidewall, not a fully enclosed gazebo. The listing describes UPF 50+ sun protection and water-resistant fabric over a steel frame. At roughly 31 lb, it is a substantial item to load, unload, and carry across a campground. The sidewall can help block low-angle sun or a breeze from one direction, but it also changes how the canopy catches wind.
For a long afternoon at an exposed campsite, the extra shade can be useful. For a simple weekend with a small tent and two people, it is often more equipment than you need. A canopy is not a substitute for a storm shelter, and the listing does not provide a safe wind-speed threshold for every setup. Use the manufacturer's anchoring instructions, secure all legs, and take it down when wind or weather makes it unstable. Check campground rules before using stakes, guy lines, or a large shelter.
- Best for: group camping, long stays, or sites with little natural shade and enough room for a 10 × 10 ft shelter.
- Think twice if: you travel light, camp on small sites, or expect strong wind or heavy rain.
- Before checkout: confirm the RS100H-S1 version with one sidewall, and check the packed dimensions and included anchoring hardware.
9. BLUETTI AC180 Portable Power Station
Model AC180 · ASIN B0C1SMJTDT · 1,152Wh · 1,800W AC output · about 35.3 lb
The AC180 is a high-capacity LiFePO₄ battery power station with 1,152Wh of storage, 1,800W of continuous AC output, and a 2,700W surge rating. BLUETTI lists four 120V AC outlets, USB-C up to 100W, USB-A ports, a regulated 12V car outlet, a wireless charging pad, and up to 500W solar input. The unit weighs about 35.3 lb and measures roughly 13.4 × 9.7 × 12.5 inches. The manufacturer lists a five-year warranty and 3,500+ cycles to 80% capacity for the battery chemistry under its stated test conditions.
Amazon showed 4.5 out of 5 from 2,642 ratings when checked on November 13, 2026. Review summaries commonly praise build quality and fast charging; the more practical complaints are weight and the difference between rated battery capacity and the energy available after inverter losses. A 1,152Wh rating does not mean every appliance can run for the same length of time. High-wattage devices draw the battery down much faster than phones, lights, or laptops.
For a basic weekend at a developed campground, a power station is usually unnecessary. Many people can charge a phone in the car or bring a small USB power bank. The AC180 starts to make sense when you have multiple devices, camera equipment, medical equipment with an appropriate power plan, or a specific need for AC power. It is a battery power station, not a fuel-burning generator; it does not remove the need to follow safe cooking and campsite rules.
- Best for: campers with a real multi-device or AC-power requirement who can justify the cost and 35 lb weight.
- Think twice if: you only need to charge a phone, headlamp, and small camera for a weekend.
- Before checkout: calculate the watt-hours your devices need, confirm the output and charging method, and read the current operating-temperature and water-protection instructions.
Which products should you buy first?
If this is your first weekend, resist the temptation to buy all nine products at once. Start with the equipment that directly affects shelter, sleep, food safety, and basic visibility. The chair and table make camp more comfortable, while the canopy and power station are upgrades for specific needs.
| Priority | Start with | Why |
|---|---|---|
| Buy or borrow first | Tent, sleeping bag, sleeping pad, headlamp or flashlight, first-aid kit, weather layers | These cover shelter, sleep, light, and basic safety. |
| Bring if needed | Cooler, drinking water, camp stove and cookware, food-storage containers | Required when your meal plan includes perishables or cooking; match them to campground facilities and rules. |
| Comfort upgrade | Camp chair, small table, extra lantern | Useful at camp, but not a substitute for core equipment. |
| Trip-specific upgrade | 10 × 10 canopy, BLUETTI AC180 | Worth considering only when shade or higher-capacity power solves a real need. |
How to pack the car without overpacking
Car camping gives you more capacity than backpacking, but a poorly packed trunk can still make the trip frustrating. Pack by the order you will need items rather than by product category.
- Put overnight and emergency items where you can reach them. Keep a headlamp, first-aid kit, water, rain layer, and a small tool kit accessible instead of burying them under the cooler.
- Load heavy items low and secure them. Coolers and power stations should not slide around when you brake. Keep heavy gear low in the cargo area and use tie-down points where available.
- Keep food separate from clean bedding. Use sealed containers for food and toiletries. Keep the sleeping bag and dry clothes in bags that protect them from spills and damp equipment.
- Pack the tent near the top or at the back. You will likely pitch it before unpacking chairs, table, or canopy. Do not make the first job at camp a full vehicle unload.
- Keep wet and dirty gear contained. Bring a separate bag or bin for muddy shoes, damp clothing, and the tent after packing up in wet weather.
- Leave room for rubbish. A dedicated rubbish bag makes it easier to keep the site clean and follow Leave No Trace principles.
A simple plan for your first weekend
Before you leave
Confirm the reservation, arrival time, site dimensions, water availability, restroom access, fire rules, food-storage requirements, and weather forecast. Set up the tent once at home. Inflate the pad, inspect the sleeping bag, test the lanterns, check the cooler drain, and charge devices. If you are using a stove, confirm the fuel type and practice lighting it outdoors in a safe, permitted area.
Friday: arrive and make camp before dark
After checking in, inspect the site, pitch the tent, organize the sleeping area, and put food in the cooler. Set out only the chair, table, and lantern you plan to use. Keep the canopy packed unless you have enough space, suitable weather, and time to anchor it properly. Eat a simple meal rather than attempting a complicated first-night cook.
Saturday: enjoy the campsite, then reset it before evening
Keep breakfast simple, refill water, and explore the campground or a nearby trail. If you leave the site, store food and rubbish according to local rules. Before dark, bring out the lantern, prepare dinner, wash dishes, and put food away. Keep a headlamp within reach and change into dry sleep clothes before getting into the bag.
Sunday: pack dry where possible and leave no trace
Pack bedding and dry items first, then take down the tent and shade shelter. Shake out the tent, check for forgotten stakes, and store wet gear separately if it cannot dry. Dispose of rubbish and food waste in the designated place, check the site for small items, and follow the campground's checkout time.
Car camping FAQs
What are the absolute essentials for a first car-camping trip?
At minimum, plan for shelter, a sleeping bag, a suitable sleeping pad, light, food, drinking water, weather-appropriate clothing, first aid, personal medication, and a way to navigate or contact help. Add a cooler if you are bringing perishable food, and add a stove and cookware if you plan to cook.
Is a four-person tent big enough for two adults?
Often, yes—especially if most luggage stays in the vehicle. Check the actual floor dimensions and whether the tent has a vestibule. A four-person rating describes a compact sleeping arrangement, not four adults plus bags and room to move around.
Do I need a sleeping pad if I already have a sleeping bag?
Yes, a pad is an important part of the sleep system. It cushions you and reduces heat loss to the ground. For cold conditions, compare published R-values rather than choosing by thickness alone.
Does a 20°F sleeping bag mean I will be comfortable at 20°F?
Not necessarily. Temperature labels are not identical across products, and personal warmth varies. The Coleman Brazos listing reviewed here states a 20°F minimum temperature but does not show an ISO/EN comfort rating in the information reviewed. Use a warmer system when the forecast approaches the stated limit.
What size cooler do I need for a weekend car-camping trip?
It depends on the number of people, the amount of food, and how much ice you need. A 48-quart cooler is a practical starting point for a couple or small group, but ice and containers reduce usable space. Keep perishable food at or below 40°F and use a thermometer if food safety is uncertain.
Is a pop-up canopy necessary for car camping?
No. It is a comfort upgrade for exposed sites or group trips. A 10 × 10 ft canopy is heavy and needs secure anchoring. Check campground rules and take it down when wind or weather makes it unstable.
Do I need a portable power station for a two-night trip?
Usually not. A phone, headlamp, and small electronics can often be handled with vehicle charging or a compact USB power bank. A large power station is useful when you have a specific AC-power need, but it adds cost, weight, and charging logistics.
Can I use a camping stove inside my tent or car if it is raining?
No. Never use a fuel-burning stove, charcoal grill, lantern, heater, or generator inside a tent, vehicle, camper, or enclosed shelter. These devices can produce carbon monoxide, which is odorless and potentially fatal. Move to an approved outdoor cooking area or use a safe alternative allowed by the campground.
What should I do with food when camping in bear country?
Follow the specific park or campground rules. Use the required bear locker, food-storage container, or vehicle storage method. Keep food, rubbish, and scented items out of the tent, and never feed wildlife.