
The best embroidery kits for adults are the ones that teach the kind of stitching you actually want to do. A staged sampler is useful when you want to learn several stitches in order. A floral project kit is easier to approach when you mainly want to finish something attractive. A large box of floss and hoops gives you more materials, but it may not teach you how to use them. This guide compares five beginner-friendly sets by instruction, fabric, thread, tools and the amount of guidance they provide, so you can choose a first kit without paying for supplies you may not need.
Affiliate disclosure: This article contains affiliate links. TestedWise may earn a commission if you purchase through them, at no additional cost to you. Read the full disclosure.
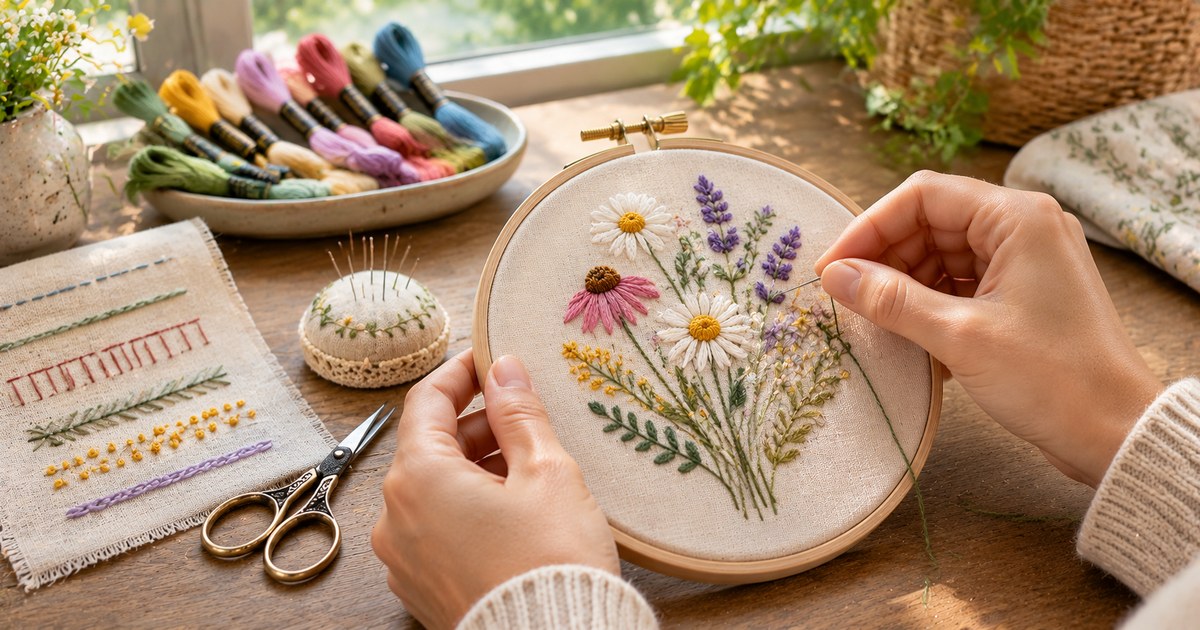
This guide is for adults and older teens in the United States who want to learn hand embroidery at home. It focuses on hand embroidery kits and beginner stitch samplers, not machine embroidery. If you already own an embroidery machine and are choosing digital stitch files rather than a hand-stitch kit, see our machine embroidery file format and design guide. Some kits also include Aida cloth or cross-stitch supplies; those can be useful, but cross stitch is a counted-grid technique and is not the same as free-form surface embroidery. Product details below come from exact Amazon identifiers, available listing information and product documentation. TestedWise has not purchased or physically stitched with these kits. Confirm the selected variation and current package contents on the live listing before ordering.
1. The five beginner embroidery kits at a glance
These sets solve different problems. Some are built around a progressive stitch lesson, some provide several finished designs to practice on, and one is primarily a large materials collection. The comparison below is about fit, not a claim that one box has been physically tested and proven better than another.
| Kit | Best fit | What stands out | Main trade-off |
|---|---|---|---|
| CYANFOUR 4-Stage, 38 Stitches | A beginner who wants a clear learning sequence | Four patterned fabrics, four instruction sets and video guidance across 38 techniques | Many stitch names at once can feel like a lot; work through the stages rather than racing ahead |
| ETSPIL 3-Pack, 33 Stitches | A learner who wants a printed guide and videos | Three pre-printed floral fabrics, 33 stitch diagrams, video lessons and a bound guide | Floral projects are the focus; check which exact design variation is selected |
| Bradove Classic Learning Kit | Someone who wants a simpler first practice set | Three patterned fabrics, an 8-inch hoop, thread, needles and instruction support | Fewer thread colors and accessories than a large supply bundle |
| TenDawn Embroidery Stitch Book | A learner who likes a compact reference format | A fabric stitch book, illustrated guides, video tutorials and 32 essential stitches | Book-style practice is different from a set of separate hoop-ready projects |
| INSCRAFT 304-Piece Set | A crafter who wants a broad color and tool collection | 200 floss colors, five bamboo hoops, Aida cloth and assorted accessories | More of a general needlework supply bundle; it is not the most focused first lesson in surface embroidery |
If you are completely new, start with the row that describes how you want to learn. If you want someone to show you each stitch, prioritize the lesson format. If you already know a few stitches and want to experiment with color, a larger supply kit may make more sense.
2. Hand embroidery, cross stitch and punch needle: know the difference
Product listings sometimes use the words embroidery, needlepoint, cross stitch and punch needle loosely. They are related needlework crafts, but they do not use the same technique or always the same materials. Knowing which one you want to learn will prevent a frustrating first purchase.
Surface hand embroidery
In surface embroidery, you bring a needle and thread through the fabric to create lines, outlines, textured details and filled shapes. The design may be printed or stamped onto the fabric, or transferred by tracing. Common beginner stitches include backstitch, stem stitch, satin stitch, lazy daisy and French knots. The fabric does not need a visible square grid; plain-weave cotton or linen is often used for freestyle designs.
Cross stitch
Cross stitch is a counted-thread technique. You make X-shaped stitches on a regular fabric grid, often Aida cloth, and follow a chart that maps colors to squares. Aida's visible holes make it easier to count and place stitches consistently. A kit with 14-count Aida, blunt tapestry needles and a chart may be a good first cross-stitch project, but it is not the same learning experience as a stamped floral hand-embroidery sampler. The Embroiderers' Guild of America explains that Aida's count refers to the number of stitch spaces per inch and that lower counts have larger, easier-to-see holes.
Punch needle
Punch needle uses a hollow or tubular tool to push loops of yarn or thread into a fabric held taut in a frame. It creates a looped or tufted surface rather than the flat stitches made with a conventional embroidery needle. Punch needle kits often require a specific tool and a compatible fabric. Do not assume an ordinary embroidery hoop, needle and floss set will work for punch needle.
3. What a useful beginner embroidery kit should include
A starter kit should remove the most common setup questions: what fabric to use, which needle to thread, how many strands to pull from the skein and where to make the next stitch. A large accessory count is not a substitute for clear instruction.
Pre-printed fabric or a practice sampler
A pre-printed design saves you from transferring a pattern before you have learned how to stitch. A sampler is useful for a different reason: it gives you repeated examples of specific stitches, so you can practice the movement without worrying about finishing a complicated picture. Check whether the pattern is printed directly on the fabric, whether the ink is washable or permanent, and whether the instructions explain how to remove it. Never assume that every stamped pattern can be washed away; follow the kit's instructions and test an inconspicuous area if the method is unclear.
Thread with enough information to use it
Six-strand cotton embroidery floss is a common beginner thread. It is made of six separable strands, and most patterns use only part of the bundle at a time. A useful kit should tell you which color to use and, ideally, how many strands to thread. If a bundle has dozens or hundreds of colors but no color key or project plan, you will have plenty of material but still need to decide how to use it.
A hoop that fits the design
An embroidery hoop holds the fabric taut while you stitch. A small hoop is easier to handle for a compact motif, while a larger hoop can accommodate more of the design without repeatedly moving the fabric. The hoop should hold the fabric securely without distorting it. A kit does not need five hoop sizes to be complete; one suitable hoop can be enough for the included project.
The right needle for the technique
Standard embroidery or crewel needles have a sharp point and an eye sized for embroidery floss. Tapestry needles have a blunt tip and are commonly used for counted-thread techniques such as cross stitch, where the needle passes through the fabric holes rather than piercing the threads. The Embroiderers' Guild of America notes that the smaller the needle size number, the larger the needle in many common needle ranges, which can seem counterintuitive to beginners. A kit that includes several needles should identify their purpose or sizes.
Instructions that teach, not just label
A stitch chart is a useful reference, but a beginner often needs to see the needle enter and leave the fabric. A good learning kit combines diagrams or a booklet with video demonstrations, especially for knots, chain stitches and stitches where direction matters. Check whether the video is accessible without an app or paid subscription, whether it is in a language you can follow, and whether it shows the exact design in your box.
Basic finishing tools
Small sharp scissors, a needle threader and a way to secure thread ends make a kit easier to use. A seam ripper can help remove a wrong stitch, but it should be handled carefully around the fabric. Floss bobbins or a numbered organizer are helpful in a large color set. Extra decorative accessories are optional; they matter less than fabric, thread, needle, hoop and clear instructions.
4. Five embroidery kits worth comparing
The five picks below represent different approaches to learning: a staged stitch course, a video-and-booklet project set, a compact practice kit, a fabric stitch book and a broad supply collection. Exact package details are based on the listed ASINs and supporting product information available during research. They are not hands-on test results, and marketplace bundles can change.
Best for a structured progression through many stitches
1. CYANFOUR 4-Stage Embroidery Kit — 38 Stitches
CYANFOUR's four-stage set is the most clearly structured learning option in this comparison. Its listing describes four patterned practice fabrics, four instruction sets, 20 thread colors, nine needles, one hoop, scissors, a thread board, a needle threader and a seam ripper. The four fabrics are arranged from easier to more challenging work, with 38 stitching techniques covered through written guidance and video tutorials.
The useful part is the progression. Instead of opening a box of unrelated supplies and choosing a pattern yourself, you have a sequence to follow. You can work on the first fabric, learn the stitches it introduces, and then move to the next stage when the earlier movements begin to feel familiar. That makes it a sensible option for someone who wants to learn more than a single outline stitch or finish one floral picture.
The trade-off is that a large stitch count can sound more impressive than it feels when you are starting. You do not need to master all 38 techniques before you can make something attractive. Treat the stages as a reference library, not a deadline. Work slowly, repeat the basic stitches on scrap fabric and return to the harder examples later. The kit is also listed in the stamped-kit category, so check the exact pattern type and instructions before assuming every design is freestyle surface embroidery.
Best for learners who want both a booklet and video lessons
2. ETSPIL 3-Pack Beginner Embroidery Kit — 33 Stitches
The ETSPIL set pairs three pre-printed floral fabrics with a 7.8-inch adjustable hoop, ten thread colors, 16 needles, a threader, a seam ripper and three instruction booklets. Its product information describes 33 essential stitch diagrams alongside high-definition video tutorials. A bound guide and storage tube are also listed for this model, although package variations can differ, so check the selected Amazon option.
This is a good fit if you like to learn from a printed reference but want video available when a stitch is difficult to visualize. Three separate designs also give you more than one chance to practice. You can repeat a stitch on the first fabric, then use it again on a later pattern without having to transfer a new design yourself.
The main limitation is that the set is built around floral motifs. That is ideal if you want botanical projects, but less useful if your first goal is lettering, clothing repair or geometric counted work. The printed pattern and the video should correspond to the same version of the kit. Before buying, verify the design variation and whether the pattern marking needs to be removed after stitching.
Best for a simpler first practice set
3. Bradove Classic Embroidery Learning Kit
Bradove's Classic Learning Kit keeps the package more focused. The listed set includes three patterned embroidery fabrics, an 8-inch hoop, five embroidery needles, seven colors of thread with about eight meters of each, and an instruction guide. Product information also describes video tutorial support.
That smaller list can be an advantage. You get several practice surfaces and a manageable set of colors without the distraction of a huge floss collection. The 8-inch hoop is a familiar size for small decorative projects and gives a beginner room to work on a design without constantly repositioning the fabric. Three fabrics also let you practice a few techniques more than once.
It is not the most extensive option for someone who wants to build a large thread library or learn dozens of named stitches in a formal sequence. Think of it as a straightforward starter kit for learning the basic movements and completing small designs. If you already know that you want to explore a broad range of stitch families, a sampler kit such as CYANFOUR or ETSPIL may offer a clearer progression.
Best for a compact, book-style stitch reference
4. TenDawn Beginner Embroidery Stitch Book — 32 Stitches
TenDawn takes a different approach from a box of separate stamped fabrics. Its beginner set is organized around a fabric embroidery book with 32 essential stitches arranged in a structured learning order. The listed components include the stitch book, a mini felt pouch, small reference charms, illustrated guides and video tutorials.
The book format may suit someone who wants to keep a physical record of what each stitch looks like. Rather than finishing a few unrelated floral pictures, you build a sample reference that can be revisited when you start a new pattern. It is also a compact option for keeping a project together in one place or taking it along when you travel.
There are two things to check before choosing it. First, a fabric stitch book is not the same as a large hoop-ready project kit; confirm whether the included pages and tools match the kind of practice you want. Second, this is a newer listing than some of the more established kits in this comparison. Read the current product details carefully and do not assume the package includes extra hoops, a large floss assortment or a finished floral pattern unless the selected version says so.
Review the TenDawn stitch-book format and listed components.
Best for a large color collection and general needlework supplies
5. INSCRAFT 304-Piece Embroidery Starter Kit
INSCRAFT is the broadest materials set here. The listed 304-piece bundle includes 200 numbered colors of embroidery floss, five bamboo hoops in several sizes, two pieces of 14-count Aida cloth, 30 sewing needles, pins, floss bobbins, threaders, a thimble, scissors, a pincushion, instructions and a storage bag.
The appeal is range. If you already enjoy needlework and want to experiment with color, keep a selection of hoops on hand or try counted-thread projects as well as basic embroidery, a large supply set can reduce the number of separate purchases. Numbered floss colors are also easier to sort and identify than a pile of unlabelled strands.
But it is important to understand what you are buying. Aida is a gridded fabric commonly used for cross stitch and other counted-thread techniques. That makes this set more of a general needlework collection than a focused surface-embroidery course. It has many tools, but the package description does not provide the same staged stitch curriculum as CYANFOUR or ETSPIL. If your goal is to learn free-form floral embroidery from zero, you may find a smaller teaching kit easier to use. If you want materials for several kinds of needlework, the broad selection is the reason to consider it.
5. How to choose fabric, floss and needles
The materials in a beginner embroidery kit affect how easy it is to see your stitches, how smoothly the needle passes through the cloth and how the finished work holds its shape. A kit takes care of some of those choices, but understanding the basics will help you spot a mismatch before you start.
Fabric: plain weave, evenweave and Aida
| Fabric | Typical use | Beginner note |
|---|---|---|
| Plain-weave cotton | Surface and freestyle embroidery | A practical starting point for stamped floral designs and simple motifs; the weave is not a visible counting grid |
| Linen or cotton-linen blend | Surface embroidery and more detailed work | Has texture and natural variation; it can be lovely, but the weave may be less forgiving for a first practice piece |
| Evenweave | Counted-thread techniques and some freestyle work | Regular horizontal and vertical threads create a grid that can be counted |
| Aida cloth | Cross stitch and counted embroidery | Visible holes make it easier to count; lower counts have larger holes |
The Embroiderers' Guild of America explains that plain-weave fabric works well for surface and freestyle embroidery, while evenweave fabric provides a more regular grid for counted techniques. Aida is a type of evenweave fabric and is commonly used for cross stitch. If a kit includes Aida, check whether the pattern is a counted chart rather than a stamped surface design.
Embroidery floss: how many strands should you use?
Six-strand cotton floss is designed to be separated. A pattern may ask for one, two, three or more strands depending on the fabric, the stitch and the coverage you want. More strands create a thicker, more visible line; fewer strands create finer detail. There is no universal strand count for every project, so follow the kit's instructions first.
To separate floss without creating a knot, cut a manageable length, hold the bundle loosely and pull one strand out at a time. Then bring the number of strands you need back together before threading the needle. Pulling a long length through fabric repeatedly can roughen the thread, so avoid using an unnecessarily long working length. The Embroiderers' Guild of America suggests that many stitchers work with a length around 18 to 20 inches or less, depending on the technique.
Needles: sharp embroidery needles or blunt tapestry needles?
For surface embroidery on cotton or linen, a crewel or standard embroidery needle is a common choice. It has a sharp point that pierces the fabric and an eye sized for floss. For cross stitch on Aida, a tapestry needle is usually used because its blunt tip passes through the holes in the grid instead of piercing the fabric threads. Chenille needles have a sharp point and a larger eye, which can help with thicker threads or heavier fabric.
Needle sizing can be confusing because a smaller number often means a larger needle. Do not choose a needle based on the number alone. Match the eye to the number of floss strands and the shaft to the fabric. The thread should pass through the eye without excessive friction, while the needle should make a hole appropriate to the cloth.
Thread color and quality
A beginner does not need 200 colors to learn backstitch or satin stitch. A small palette is enough to practice outlines, leaves and simple flowers. What matters more is that the colors are identified and the thread is easy to separate. If you plan to add colors later, keep the brand and color numbers together so you can replace a shade consistently. Different manufacturers can vary in thickness, sheen and color even when the shade names look similar.
6. How to set up an embroidery hoop
A hoop is not just a frame for the finished design. It holds the fabric under even tension so the needle can pass through consistently. If the fabric is loose, stitches may look uneven. If you pull too tightly, the cloth can pucker and the design may distort.
- Separate the rings. Loosen the screw on the outer ring and lift it away from the inner ring.
- Center the fabric. Place the inner ring on a flat surface and lay the fabric over it, keeping the design centered with enough extra cloth around the edges.
- Fit the outer ring. Press the outer ring over the fabric and inner ring, then tighten the screw just enough to hold the cloth.
- Adjust the tension. Gently pull the fabric edges around the hoop until the surface is taut and even. Tighten the screw gradually rather than pulling one side hard.
- Check as you stitch. Fabric can loosen while you work. Re-tension it when needed, and avoid leaving the fabric stretched in the hoop for long-term storage.
The fabric should feel firm, not stretched out of shape. DMC's hoop guide recommends keeping the fabric taut and pulling each stitch with consistent tension; loose stitches can look limp, while tight stitches can pucker the cloth. For a larger design, move the hoop as needed or use a larger frame rather than forcing the entire project into a hoop that is too small.
7. Seven stitches to learn first
You do not need to memorize dozens of stitches before you begin. A small group covers much of what appears in beginner floral and decorative designs. Practice each one on a scrap of plain cotton before working on the printed kit fabric.
1. Running stitch
Running stitch is a simple line of evenly spaced up-and-down stitches. Bring the needle up, move a short distance along the design line, take it down, then bring it up again. Keep the stitch lengths and gaps reasonably consistent. It is useful for light outlines, borders and simple details.
2. Backstitch
Backstitch creates a continuous line, which makes it useful for lettering, stems and outlines. Bring the needle up at the end of the previous stitch, then take it back down into the end of that stitch. Bring it up a short distance ahead and repeat. The stitches should meet neatly without overlapping into bulky knots.
3. Stem stitch
Stem stitch makes a slightly twisted line that works well for flower stems, vines and curved outlines. Keep the working thread on the same side of the needle as you build the line, and use small, consistent stitches around curves. It can look different depending on which side the thread sits, so follow one diagram or video consistently.
4. Straight stitch
Straight stitch is a single stitch from one point to another. It is useful for small leaves, rays, flower details and simple geometric marks. The important thing is to keep the length appropriate for the design; very long straight stitches can snag more easily than shorter ones.
5. Satin stitch
Satin stitch fills a small shape with parallel stitches laid closely side by side. Bring the needle up at one edge of the shape and down at the opposite edge, then repeat with the stitches close enough to cover the fabric without bunching. Start with a small shape such as a leaf or petal. Large filled areas are harder to keep smooth and may be better split into sections.
6. Lazy daisy
Lazy daisy creates a looped petal. Bring the needle up, take it down close to the same point while leaving a loop on the surface, then bring the needle up at the end of the loop and catch it with a small stitch. Repeat around a center point to make a flower. Keep the loop size similar so the petals look balanced.
7. French knot
French knots create small raised dots that work well for flower centers and textured details. Bring the needle up, wrap the thread around the needle one or more times as the pattern specifies, then insert it close to—but not in—the original hole while keeping the wraps controlled. Pull the thread through slowly. It often takes a little practice to keep the knot on the fabric surface rather than pulling it through to the back.
DMC provides step-by-step diagrams and video tutorials for these and many other stitches. The DMC stitch guide is a useful reference to keep open while practicing. The Embroiderers' Guild of America also has a beginner resource hub with guides to needles, fabric, floss and common stitches.
8. Your first embroidery session, step by step
Set aside a short, unhurried session rather than trying to finish the entire design in one sitting. The first goal is to learn how the fabric, needle and thread behave together.
Step 1: Check the kit before opening every thread
Lay out the fabric, hoop, needles, floss, scissors and instructions. Compare the package with the listed contents. Find the design key and identify the thread colors used in the first section. If the kit includes multiple fabrics, choose the easiest one and leave the more detailed designs for later.
Step 2: Read the pattern's strand and stitch instructions
Check how many strands to use and which stitch is assigned to each line or shape. If the pattern uses a symbol or color number, match it before threading the needle. Do not assume that all six strands in a skein should be used together.
Step 3: Prepare a short length of floss
Cut a length that is comfortable to handle—roughly 18 inches is a useful starting point for many beginners. Separate the required number of strands, then smooth them back together. Thread the needle and leave a short tail at the end. If threading is difficult, use the included threader or a needle with an eye that suits the thread.
Step 4: Secure the fabric in the hoop
Center the design and tighten the hoop until the fabric is taut. Make sure the printed lines are not pulled out of shape. If the fabric is too small to grip securely, use a larger hoop or follow the kit's method for holding the fabric.
Step 5: Practice one stitch on scrap fabric
Before working on the actual design, make a short row of running stitch or backstitch on a spare piece of fabric. This helps you get used to the needle and thread length. If the kit does not include spare cloth, use an inexpensive scrap of plain cotton rather than practicing on a finished garment.
Step 6: Work in small sections
Follow the pattern in the order it recommends. Keep the thread tension even: pull until the stitch lies flat, then stop. If the fabric begins to pucker, the thread may be too tight or the hoop may need adjustment. Check the back of the work occasionally for long loops and tangles.
Step 7: Finish and store the project correctly
Secure the thread on the back according to the pattern or a trusted tutorial, trim the tail without cutting nearby stitches, and follow the kit's guidance for removing printed markings. Do not wash a project until you know whether the ink is water-soluble and whether the floss is colorfast. When you finish for the day, remove the fabric from the hoop if you will not continue soon, or at least loosen the tension to reduce the chance of hoop marks.
9. Beginner mistakes and how to fix them
- Pulling every stitch tight: Embroidery is not stronger when the thread is pulled as hard as possible. Let the floss lie on the fabric. If the cloth puckers, loosen the tension and re-hoop it evenly.
- Using all six strands by default: Many patterns call for one or two strands. Too many can make small details bulky and difficult to place. Follow the strand count printed in the instructions.
- Working with a very long thread: Long floss travels through the fabric more times and can become worn, fuzzy or tangled. Use a shorter length and start a new thread when needed.
- Choosing the wrong needle: A blunt tapestry needle is not the best choice for piercing tightly woven cotton in surface embroidery. Match a sharp embroidery needle to the fabric, and use a tapestry needle for counted work on open-grid cloth.
- Assuming Aida and stamped cotton are interchangeable: Aida is designed around a grid; a printed surface pattern may require stitches placed through the fabric rather than counted squares. Follow the technique the kit teaches.
- Leaving the hoop too tight for days: Long-term tension can leave creases or marks. Remove or loosen the fabric when you are not actively stitching.
- Washing before checking the ink: Some patterns use water-soluble markings, while others may use a different printing method. Read the instructions and test first; heat can also make some marks harder to remove.
- Buying a huge thread set before choosing a project: A large color collection is only useful if you have a way to identify shades and store them. Start with the colors your pattern calls for.
- Expecting every video to match every variation: Brands sometimes sell several designs or bundle versions under similar names. Confirm that the instructions and selected variation correspond to the exact kit in your cart.
10. Embroidery kit buying checklist
Use this list before you buy. It focuses on the things that make a first project easier, not the number of pieces printed on the box.
- The kit is for hand embroidery, cross stitch or punch needle—the technique I actually want to learn.
- It includes a beginner pattern, a stitch sampler or a clear project plan.
- The instructions include diagrams or video demonstrations, not just a list of stitch names.
- The fabric type is stated and suits the technique.
- The floss colors are identified, and the instructions explain how many strands to use.
- The needle type is suitable for the fabric and thread.
- The hoop is large enough for the design and holds the fabric securely.
- Scissors, a needle threader and basic finishing tools are included or easy to add.
- The exact Amazon variation matches the product photos and package list.
- I am choosing the kit for its learning support and project fit—not just its piece count.
If you are deciding between embroidery and another beginner-friendly yarn craft, our guide to the best crochet kits for beginners explains how project kits and open-ended supply bundles differ in a similar way.
Embroidery kit FAQs
What is the best embroidery kit for adults who are beginners?
Choose a kit with a clear first project, pre-printed or practice fabric, the correct needle and thread, and instructions that show the stitches. CYANFOUR's four-stage kit is a good fit for someone who wants a structured stitch progression. ETSPIL is worth comparing if you prefer a printed guide paired with video tutorials. The best choice depends on whether you want to learn many stitches or finish a few floral designs.
What should a beginner embroidery kit include?
A useful hand-embroidery kit usually includes fabric, embroidery floss, a suitable needle, a hoop and instructions. Scissors and a needle threader make setup easier. A kit with several fabrics or a stitch sampler can provide practice, but a large accessory count is not essential if the core materials and lesson are clear.
Is hand embroidery easier than cross stitch?
Neither is automatically easier for everyone. Cross stitch uses a repeated X-shaped stitch on a counted grid, so the movement is simple but counting and chart reading matter. Surface hand embroidery uses several stitches and more freedom in placement, which can be creative but requires learning different movements. Choose the one that matches the finished work you want to make.
What is the easiest embroidery stitch to learn first?
Running stitch is a straightforward first exercise because it uses a repeated up-and-down movement. Backstitch is also useful early because it makes a continuous outline. Practice both on scrap fabric before trying a satin stitch fill or French knot.
How many strands of embroidery floss should a beginner use?
Many six-strand cotton floss patterns use one or two strands for surface embroidery, but the right number depends on the fabric, stitch and desired thickness. Follow the kit's pattern first. Separate the strands before recombining the number you need, rather than pulling the whole skein through the fabric.
What fabric is best for beginner hand embroidery?
A stable, medium-weight plain-weave cotton is a practical starting point for many surface embroidery projects. It is easier to work on when the fabric is not stretchy or extremely fine. Aida is useful for cross stitch because its grid makes counting easier, but it is not the default fabric for every style of hand embroidery.
Do I need an embroidery hoop?
A hoop is helpful because it holds the fabric taut and makes it easier to keep stitches even. Some experienced stitchers work without one, but beginners often find a hoop useful. Choose a size that fits the design and adjust the fabric so it is firm without being stretched out of shape.
What size embroidery hoop should a beginner buy?
There is no single best size. A 6- to 8-inch hoop is common for small decorative projects and practice designs, but the pattern size should guide the choice. A larger design may need a larger hoop or repositioning as you work. The hoop should hold the fabric securely without covering too much of the area you need to stitch.
Are embroidery kits with video tutorials worth it?
Video can be especially helpful when you are learning how to move the needle, wrap thread or make a knot. It lets you pause and replay a stitch from a close angle. A good printed diagram is still useful as a quick reference, so a combination of both formats can be more practical than relying on either one alone.
Can I wash embroidery after finishing?
Only after checking the fabric, floss and pattern-marking instructions. Some printed designs use water-soluble ink, while other marks may need a different removal method. Washable thread and colorfastness also vary. Follow the kit's guidance, test an inconspicuous area and avoid heat until you know the marking has been removed.
What is the difference between an embroidery needle and a tapestry needle?
A standard embroidery or crewel needle has a sharp point for piercing woven fabric and an eye suited to embroidery thread. A tapestry needle has a blunt tip and a larger eye; it is commonly used for cross stitch and counted-thread techniques where the needle passes through holes in Aida or evenweave rather than piercing the fabric threads.
Is a large 200-color embroidery floss kit good for a beginner?
It can be useful if you already have patterns and want a wide color selection, but it may be overwhelming as a first purchase. A large floss set does not automatically include a learning sequence or clear project instructions. If you are new, a smaller kit with a defined first project is usually easier to start with; add a large color collection once you know how you like to stitch.
A good first embroidery kit should make the next stitch obvious. Start with a design you like, use the needle and number of floss strands the instructions specify, and practice the basic stitches before worrying about perfect results. Once you understand how fabric tension, thread and stitch direction work together, you can move from a small sampler to clothing details, framed art, gifts and your own designs.